Please refer to Emergenceingames.com’s post-processing tutorial for photos in Lightroom below to learn how to process and edit photos in Lightroom.
Photo post-processing is one of the features that users need to know when using Lightroom, it’s a way for you to make your photos look better, more attractive, to have more Lightroom tips. , you can find out through articles on Taimienphi.
If you have not downloaded Lightroom to your device and installed it, you can download it Lightroom Photo editing tool on your device and install it.
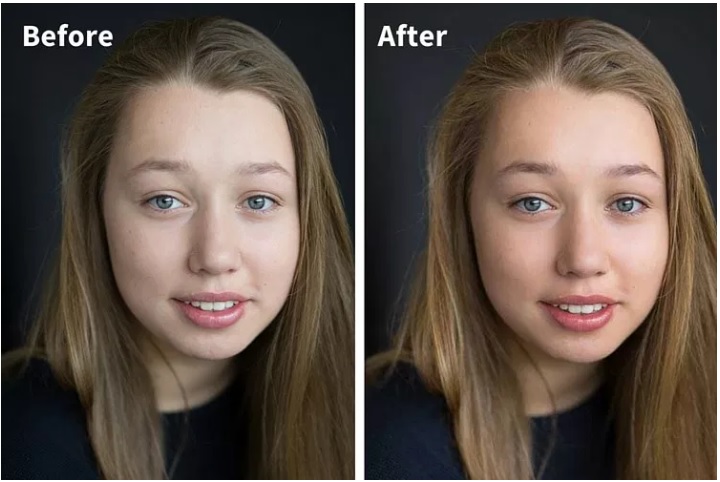
Instructions for post-processing photos in Lightroom
Follow the steps below to post-process a photo in Lightroom:
Step 1: Import image files
In the Library module, import your image file into Lightroom. If you want, you can apply the built-in image import settings, or use a dedicated keyboard shortcut, especially in case you need to import a large number of images.
To apply the available import settings, on the Lightroom window, go to the panel on the right, then go to Apply tab during import. Access Develop settings =>User presets and click on the preset you want to apply.
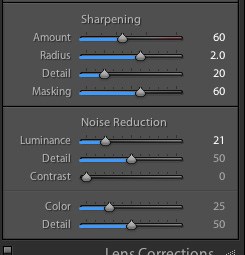
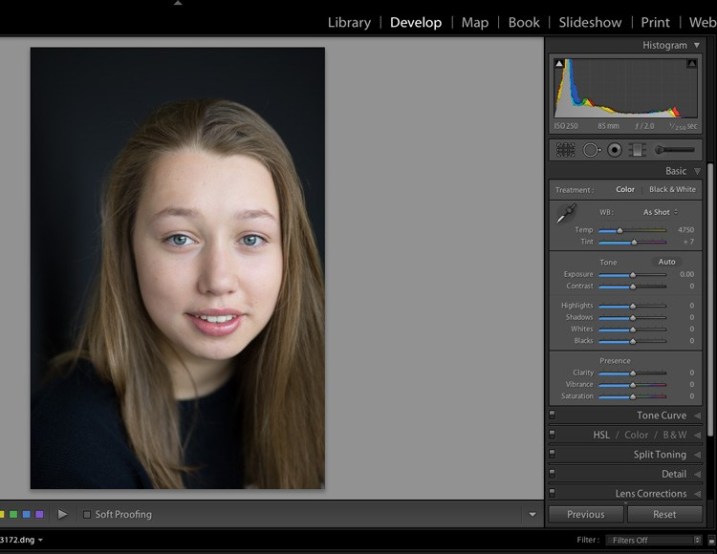
After importing the image file, you access the Develop module.
Step 2: Adjust white balance
There are many ways to adjust white balance. If the image file uses a neutral color gamut, you can use the Eyedropper tool. In this tutorial, the image file has no neutral reference, so Emergenceingames.com will move the slider under the White Balance section to balance the color gamut in the image file.
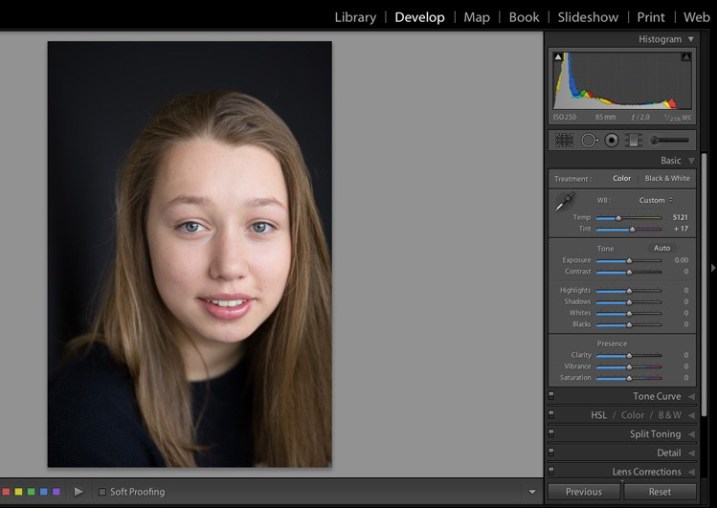
Step 3: Adjusting highlights and shadows
The skin tone of the image in the image file is a bit light, the hair color and the background are a bit dark. To color balance the objects in the image, we need to adjust the highlights and shadows. If necessary, we can adjust these settings later.
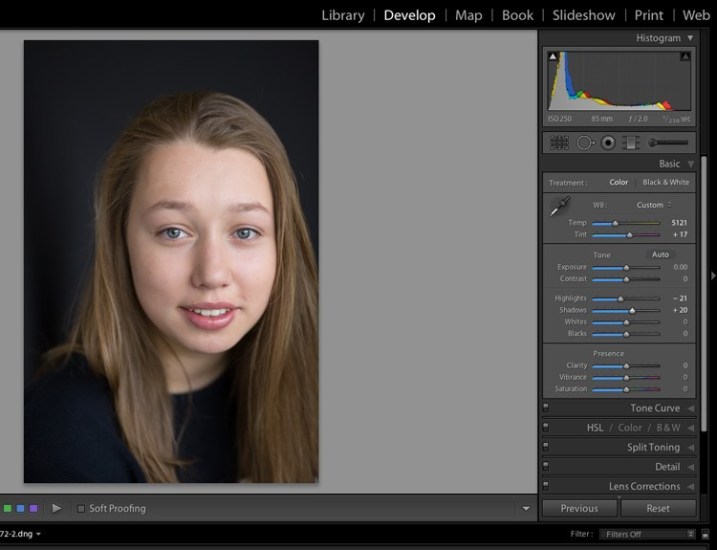
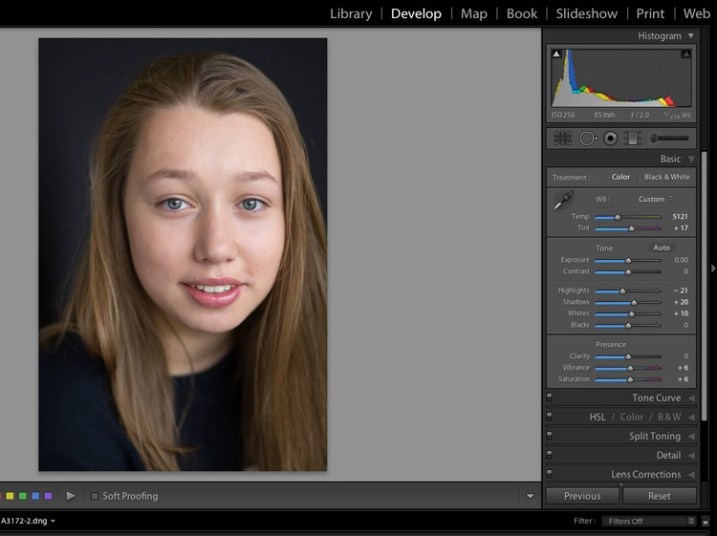
Step 4: Increase Vibrance and Saturation
Next use the sliders under the Presence tab to increase the vibrance and saturation of the image, then move the Whites slider to the right to adjust the portrait image and skin tone more realistically.
Step 5: Crop photo
We can crop the image in any arbitrary position to make it the most reasonable.

Step 6: Skin retouching and smoothing
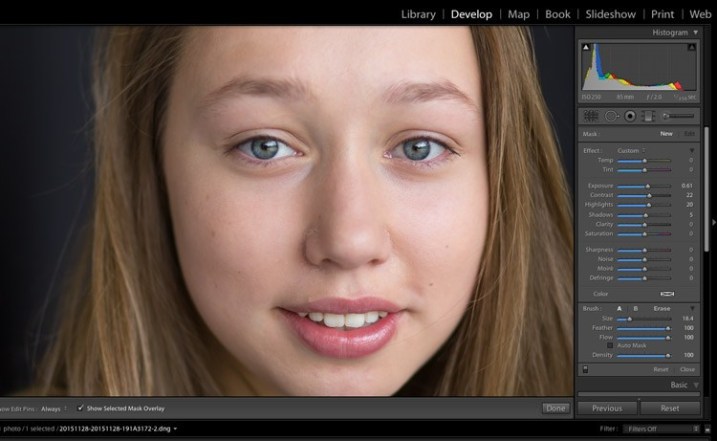
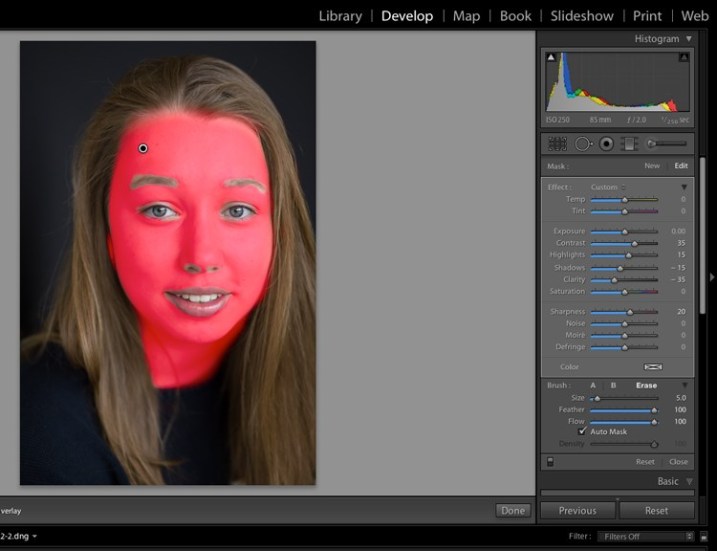
Zoom in, zoom in on the skin to correct, fade acne, scars or wrinkles. Select the Brush tool and adjust any settings you want to apply. Although presets can be used for skin retouching, teeth whitening, etc., these settings make the photo look unreal.
Adjust the Clarity slider down to about -35 or -40 (Contrast to +35 and Highlights to +15 or so, this is to maintain contrast and convert the subject’s face in the image to a Flat background), Sharpness up +20. These options and settings can vary depending on the skin of the subject in your image file and the type of effect you want to apply.
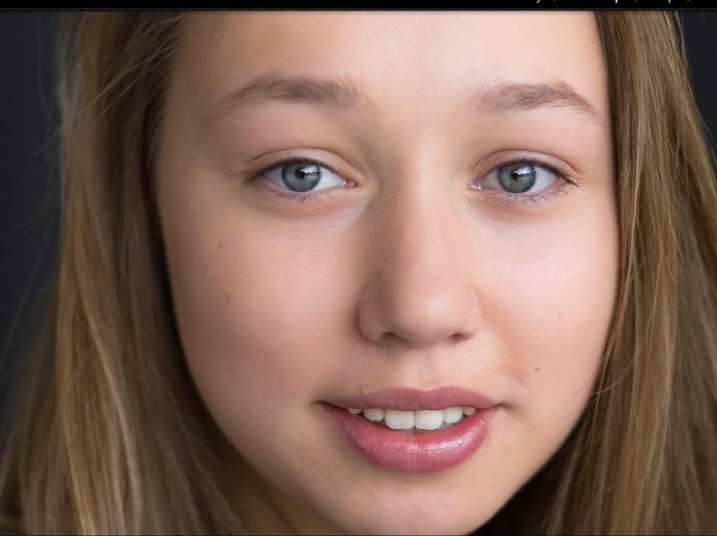
The example below applies the above settings to make the skin tone more even and the skin to look brighter.
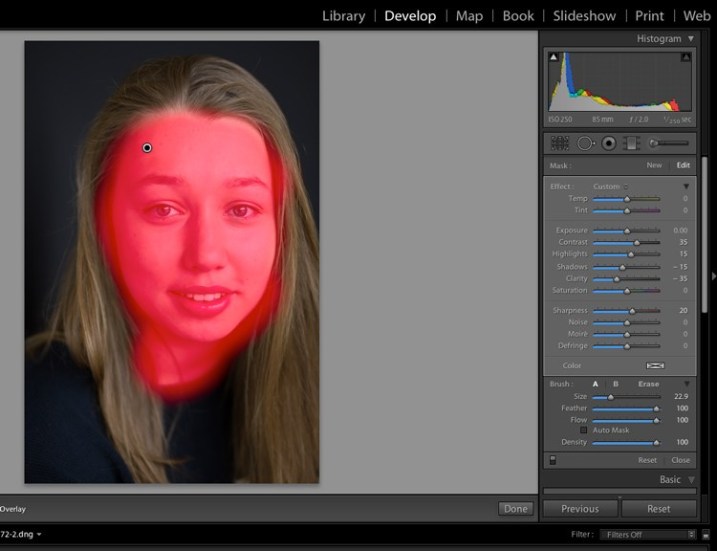
Adjusting the Clarity slider further down will merge the layers, making the image completely “flat”, like no layers, so we can increase the Contrast, increase the shadows and increase the highlights to balance out plain. Feather and Flow options remain at 100%.
Step 7: Fine-tune the adjustments
At the bottom of the image, check the box Show selected mask overlay (or use the keyboard shortcut O) to see exactly what part of the image using the Adjustment Brush. Still using the Adjustment Brush, click on the eraser brush and erase the brush effects around the eyes, mouth and hair.
Step 8: Editing the eyes
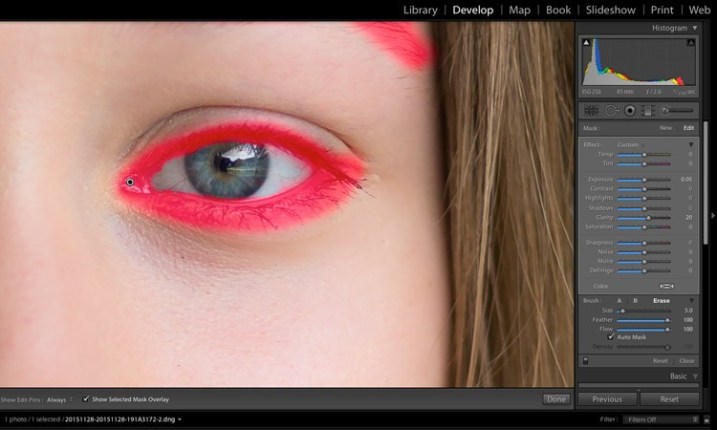
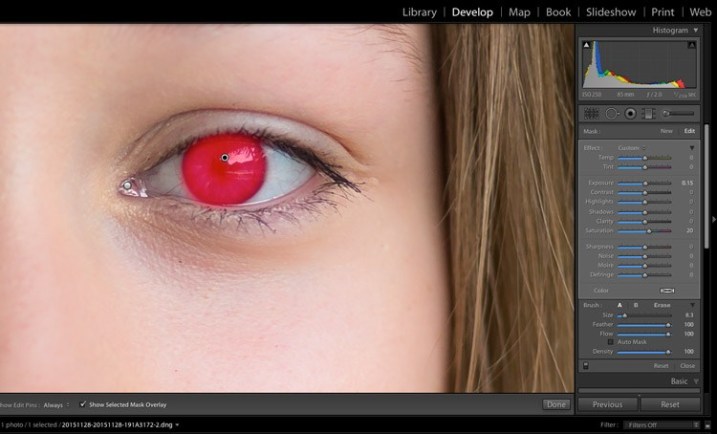
Enlarge the subject’s face in the photo even further, then use the Adjustment Brush to sharpen and retouch the eyes for a more glittery look. A small note is that the more Clarity is increased, the other parts of the image will be darker. For balance, we will adjust the Exposure slider.
In the example below, Emergenceingames.com also increased the saturation of the iris a bit to make the model’s eyes look bluer.
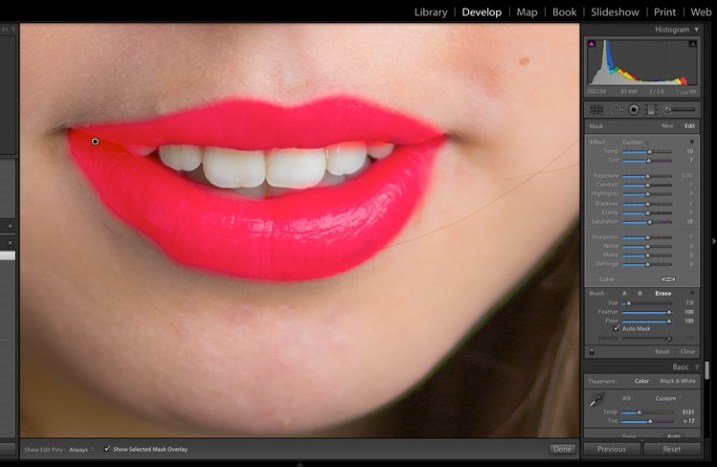
Step 9: Lip color correction
The next step is to move to the lips of the subject in the image. In this step we apply the same techniques as with the eyes to retouch the lips, adjust the brush, clarity and increase the saturation.
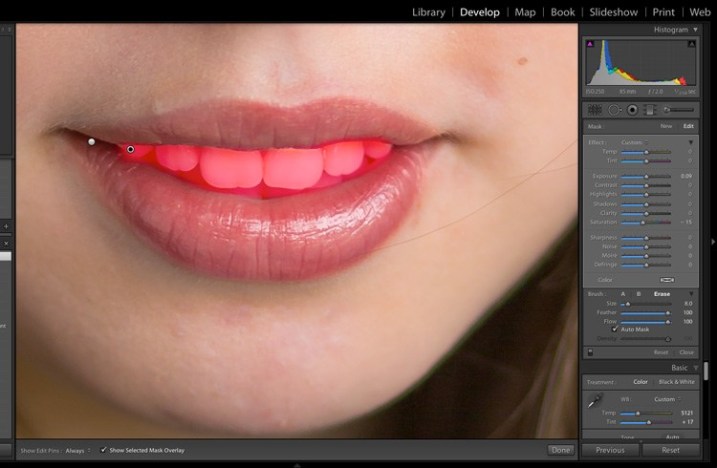
Step 10: Tooth whitening
To edit and whiten the teeth, we continue to use the brush tool, reduce the % Saturation slider and increase the % Exposure tool a bit.
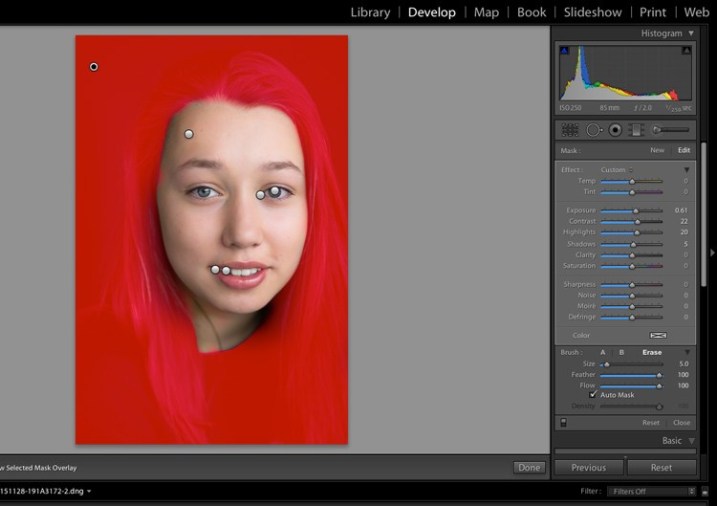
Step 11: Edit hair and background color
The last step we need to do is to edit the hair color and background color a bit lighter to reduce the contrast between the face and the background color.
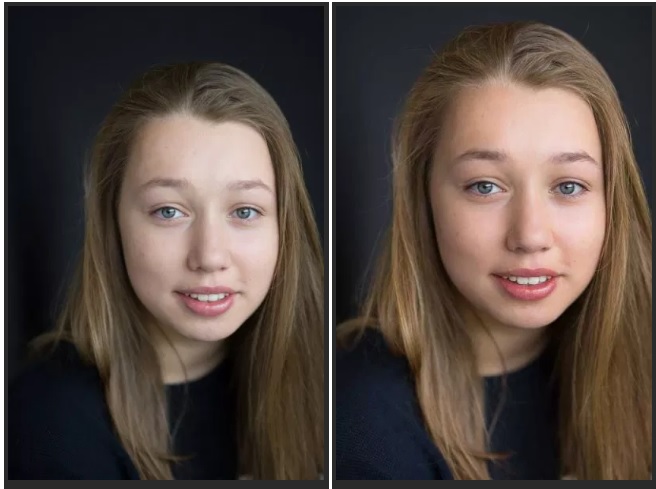
The before (left) and after (right) images can be seen when editing is different from one another:
So above, Emergenceingames.com has just guided you through the steps of post-processing photos in Lightroom. In addition, if you do not know how to import photos in Lightroom or export photos and save photos in Lightroom, readers can refer to some of the existing articles on Emergenceingames.com to know how to do it.
https://thuthuat.Emergenceingames.com/huong-dan-xu-ly-hau-ky-anh-trong-lightroom-44702n.aspx
Before post-processing your photos, you need to know how to import photos in Lightroom, that is, import photos from your computer’s hard drive and put them on the program interface, if you don’t know yet. How to Import Photos in Lightroom You can see specific instructions from our article.
Related keywords:
Instructions for post-processing photos in Lightroom
post-process images in Lightroom, import photos in Lightroom,
Source link: Instructions for post-processing photos in Lightroom
– Emergenceingames.com


