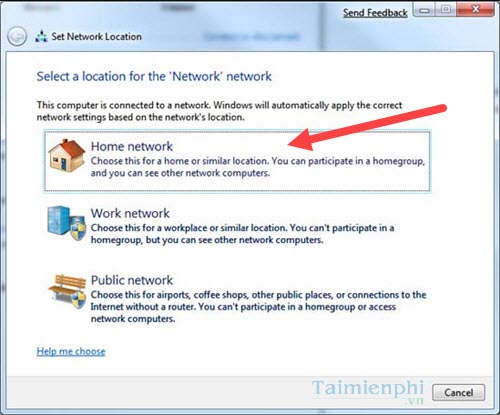
There are all 3 modes including HomeGroup, Work and Public built into Windows 7 version. In each mode, different permissions are set to help creators and participants better control file sharing via LAN on Windows 7.

Creating and setting up Work Groups on Windows 7 is not difficult and its use is also very simple. If you are using a home network, creating a WorkGroup on Windows 7 makes a lot of sense, so the guide to connecting a HomeGroup network in Windows 7 through this article will show you not only connecting but also benefiting you. benefits of file sharing.
How to connect HomeGroup network in Windows 7, share files in home network
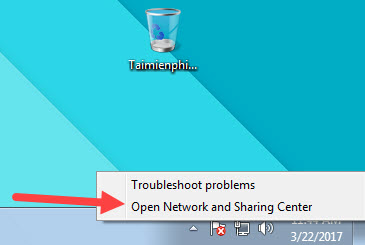
Step 1: First you look at the right corner of the screen, where there is an icon Network then right click select Open Network and Sharing Center.
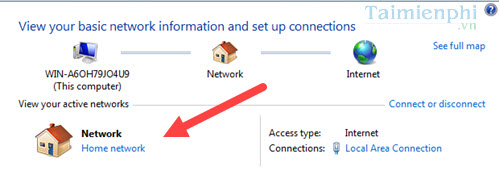
Step 2: In Network and sharing Center you click on the icon Network (in the picture is Home Network)
Step 3: Choose 1 of 3 Network, of course here we will choose Home network.
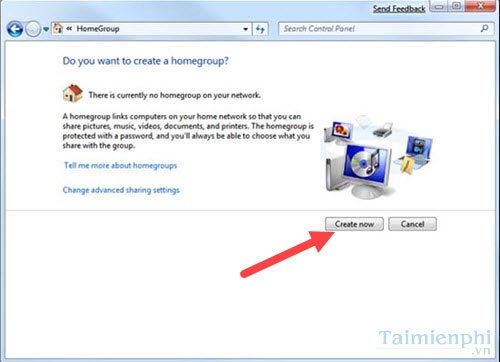
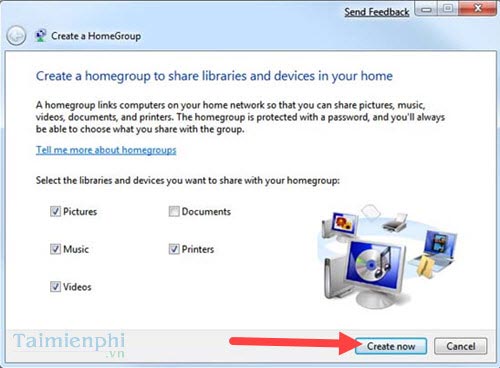
Step 4: Continue to choose Create now to create a new HomeGroup.
Step 5: This step allows you and your participants to share what, here includes Pictures (Photo), Douments (file files), Music (music), Printers (printer) or Videos (movie). If you agree to allow sharing, tick Createnow.
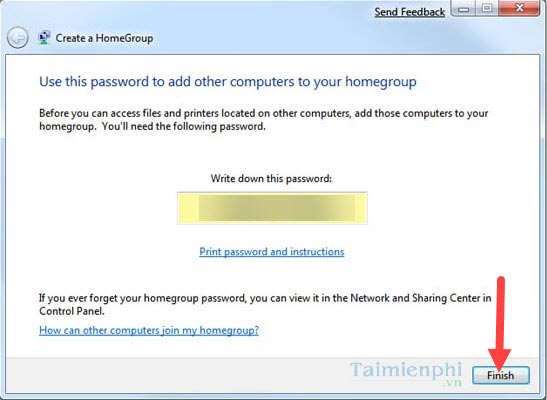
Step 6: The next step the password will appear, you must be very careful to store this password for members who want to join because it is quite difficult to remember. finish.
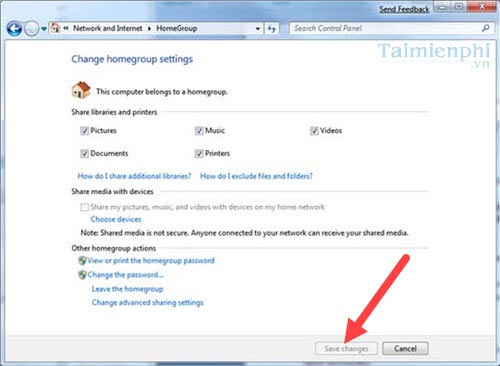
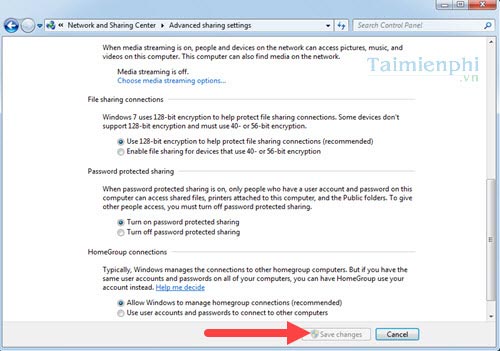
Step 7: Here you can continue to install more about HomeGroupif nothing changes you can skip this step, otherwise remember Save changes when off.
– Also you can set up more sharing permissions directly in Network and Sharing center with 6 different options.
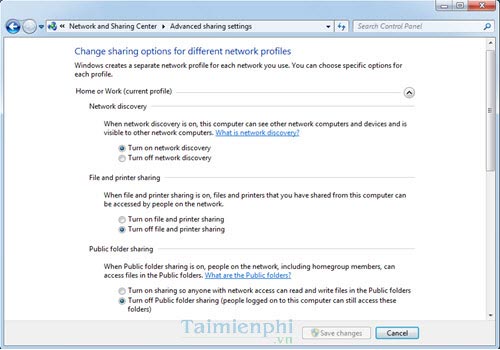
After you have installed everything as shown, you can Save changes to save this setting and the job of connecting to the HomeGroup network in Windows 7 is complete.
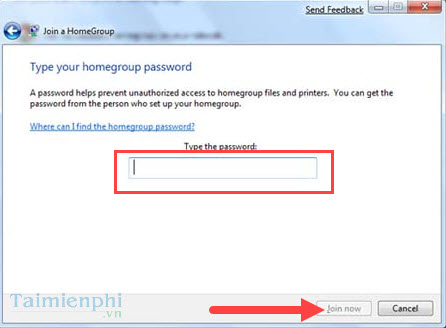
Step 8: After connecting to the HomeGroup network in Windows 7 we proceed to Join the network. The step to perform Join the network is the same as the stage to create a group, but here we will also select the Group already set up in the network and enter the password.
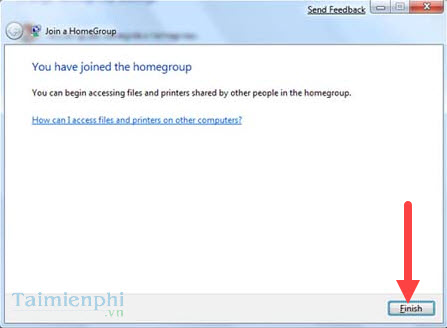
Step 9: If you enter the correct password, press finish to end the join process.
Step 10: When you join successfully, there will be more features on your Menu bar Share with with HomeGroup you just joined.
So Emergenceingames.com has just finished instructing you how to connect to the HomeGroup network in Windows 7, we proceed to Join the network. With the implementation of the HomeGroup network connection in Windows 7 will help you share files in a small, family environment extremely convenient. But that’s how to share in the family model, and if you want to share files remotely, or store files online, sharing files on Google Drive is very convenient, you should try and apply it to your work. see how.
https://thuthuat.Emergenceingames.com/ket-noi-mang-homegroup-mang-gia-dinh-trong-windows-7-22497n.aspx
Related keywords:
connect to homegroup windows 7
join homegroup windows 7, join homegroup windows 7,
Source link: Connecting to a HomeGroup network, a home network in Windows 7
– Emergenceingames.com
