In today’s article, Emergenceingames.com will introduce to you a very cool trick for Photoshop users that is how to Create light and shadow effects in Photoshop. With how to create light and shadow effects in Photoshop will help you better understand a lot of tools as well as how to combine when using Photoshop to create the most impressive photo.

Instructions for creating light and shadow effects in Photoshop
– To ensure that all operations you do are similar to 100% of Emergenceingames.com instructions, at least in terms of the location of the public services, we suggest you to download them. Photoshoplatest here.
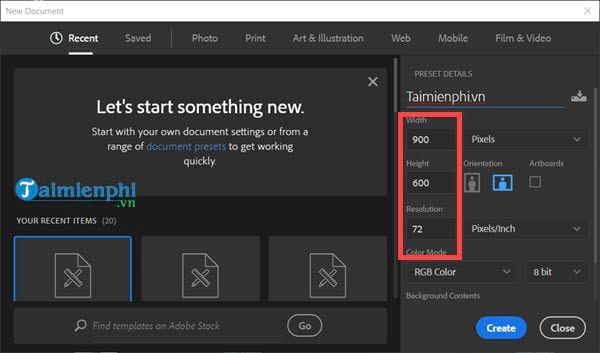
Step 1: Now let’s start creating light and shadow effects in Photoshop with Emergenceingames.com by creating a new file of size 900 x 600.
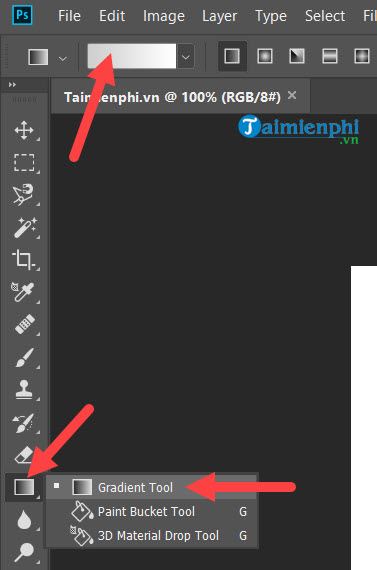
Step 2: Click tool Gradient Tool (shortcut G) and click on the color picker.
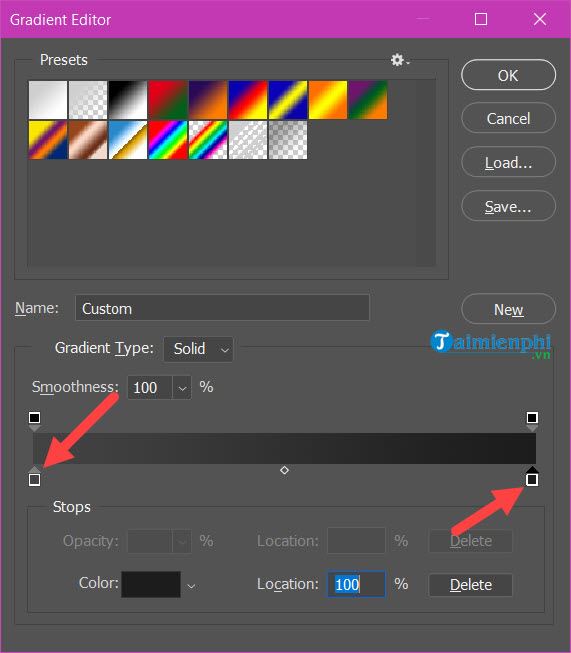
Here you choose the color #434343 for left and color #1C1C1C for the right.
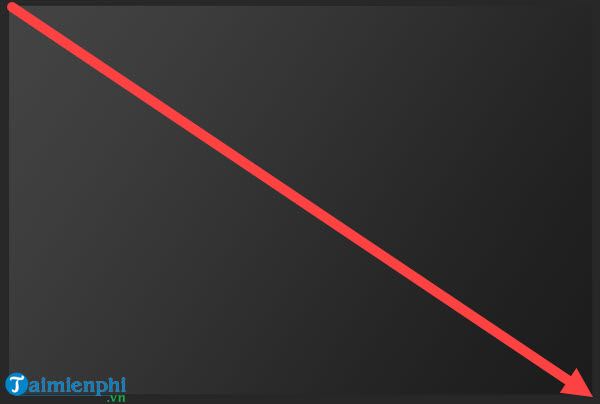
Step 3: Drag and drop from top to bottom in the direction of the arrow as shown in the picture you will get a dark gray background.
Step 4: Use Text tool (shortcut T) then write any letter, choose color #C2C8D4 For it, the font is up to you however Emergenceingames.com recommends you use any font with clear strokes and angular.

Step 5: Keep key Ctrl + then click on the letter T icon of the text layer you just created.
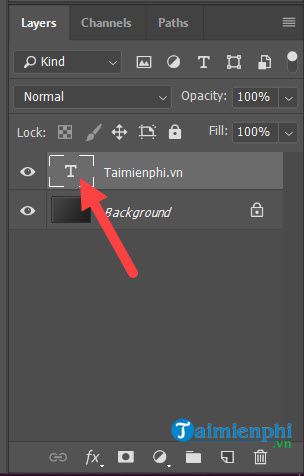
As a result, you will select the entire text layer just written.

Step 6: Press the key combination Ctrl + Shift + FEMALE to create a new layer, here we call it Emergenceingames.com new.
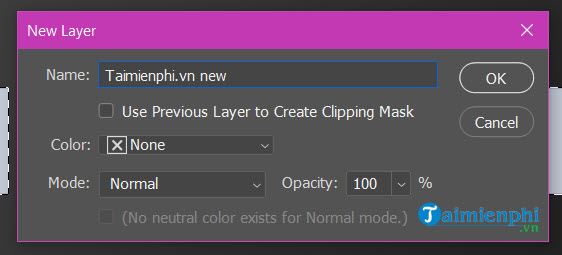
Step 7: Open the Gradient tool again and choose the color to use for this layer.
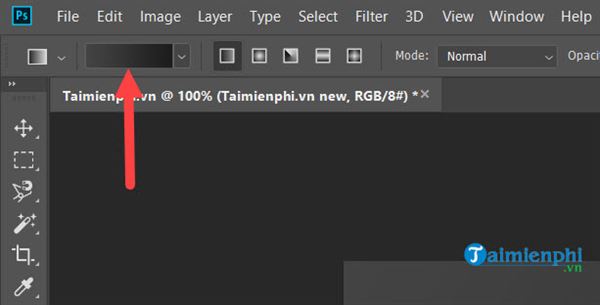
Here you choose the color on the left is #495A79on the right you set transparent ie for Right Opacity to 0% is to be.
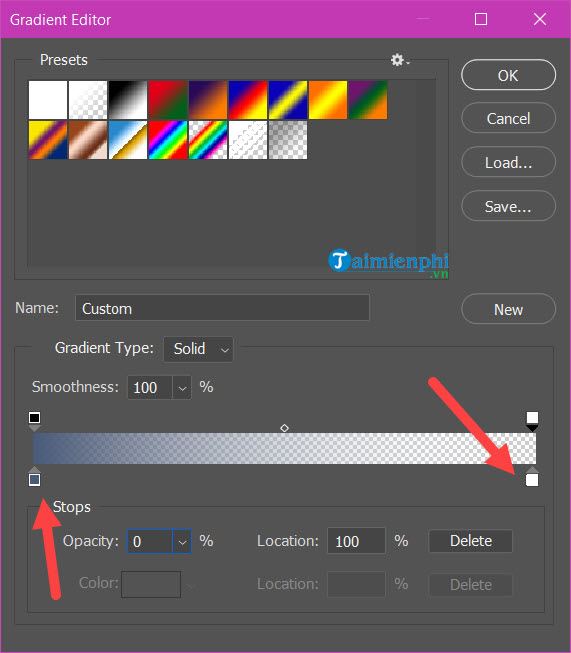
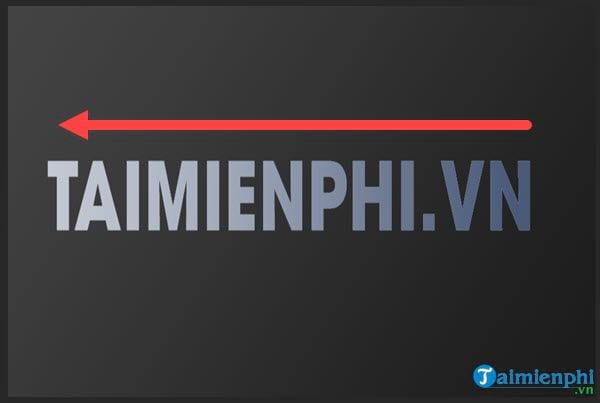
Step 8: Filling color on this new Emergenceingames.com layer from right to left will be as shown below.
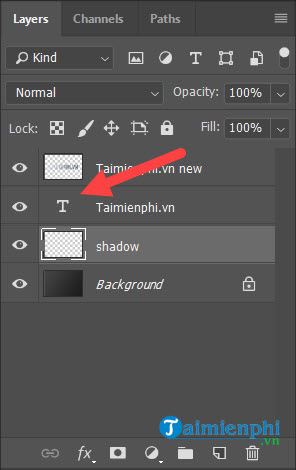
Step 9: Continue to create a new layer named Shadow, the layer below the text layer. Here you do the same Keep Ctrl + then click on the icon of the text layer.
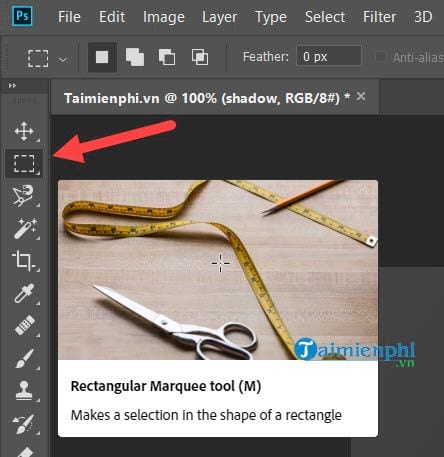
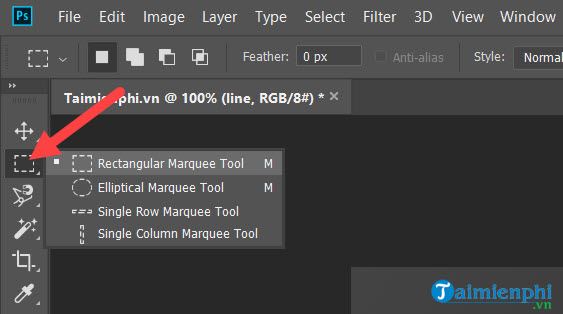
Step 10: Then use the tool Rectangular Marquee tool (Shortcut M).
Step 11: Here you hold Ctrl then use 4 navigation keys up and down left and right to adjust the circled part.

Step 12: Adjust it like this or whatever you want, when you feel like it, press Alt + Delete to shade it.

The result after creating the shadow by the above way will be as shown below, users to create more realistic light and shadow effects in Photoshop can redo this Alt + Delete operation many times.

To finish uncheck remember press Ctrl + EASY Please.
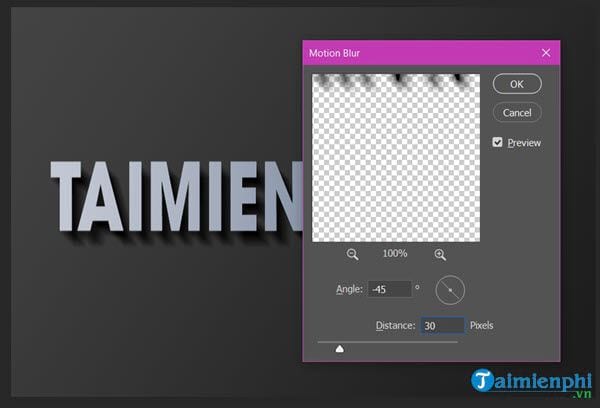
Step 13: Still on this shadow layer select Filter > choose next Blur > then select Motion Blur.
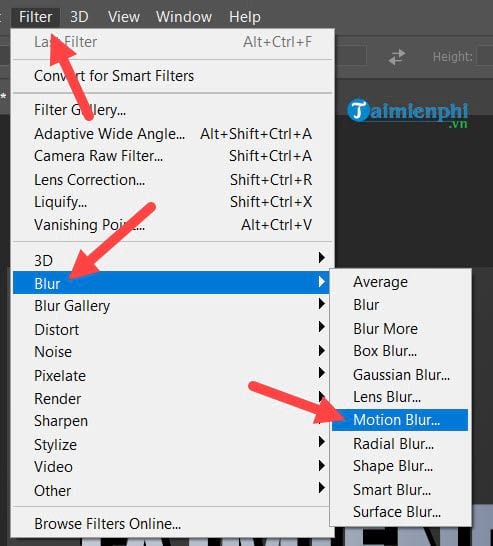
Here we give value Angle is -45 and Distance to be 30.
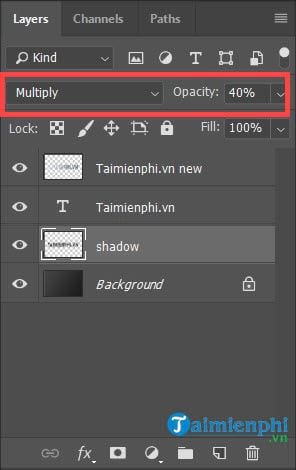
Step 14: Then adjust this shadow layer to Multiply mode and to Opacity to be 40%.
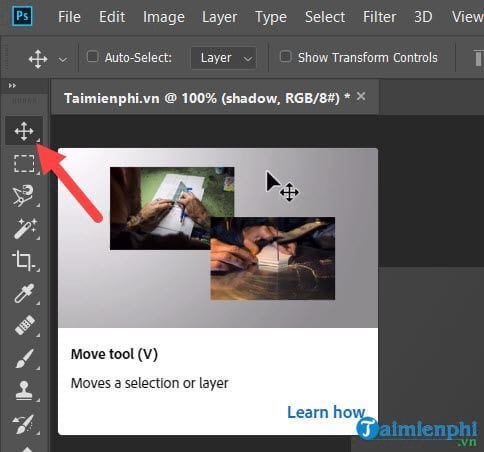
Note: To make the shadow look more realistic this step you can use Move tool (shortcut V) but this step is completely optional for you to follow. Here you use this tool to move the ball as you like.
The result after shifting the shadow will be as below, so we have completed 50% of the process of creating light effects and shadows in Photoshop already.

Step 15: Duplicate the layer shadow, repeat step 13, but set the Distance value to 50.
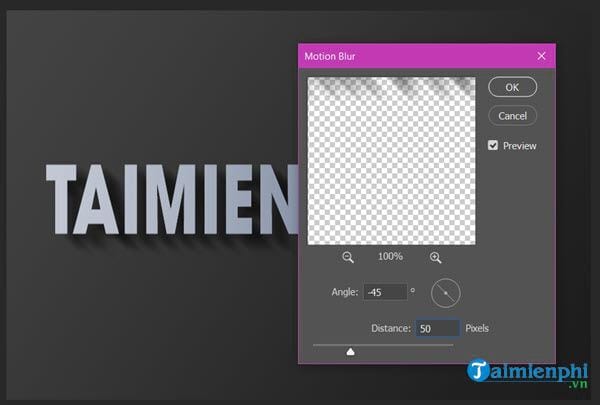
Then calibrate to Multiply mode then decrease Opacity down to 20%.
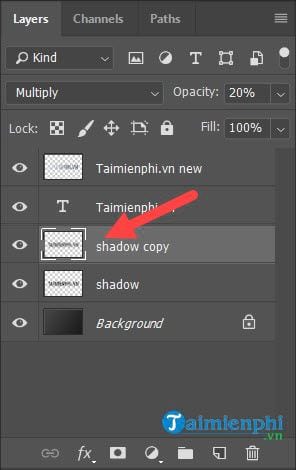
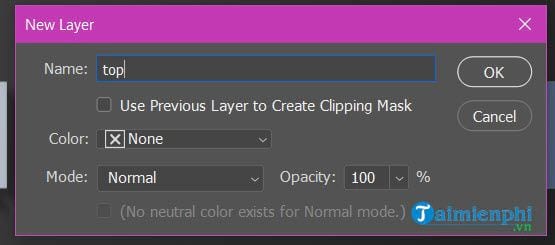
Step 16: Create a new layer put it on top and name it top (whatever you want).
Step 17: Put the layer on top and hold Ctrl and click on the icon of the text layer.
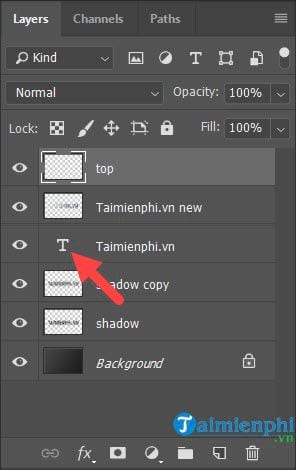
Here you press Ctrl + Delete Leave this new layer white.

Step 18: Then decrease Opacity of the this layer down to 80% will be as below.

Step 19: Create a new layer and name it line, same layer lines This will put at the top.
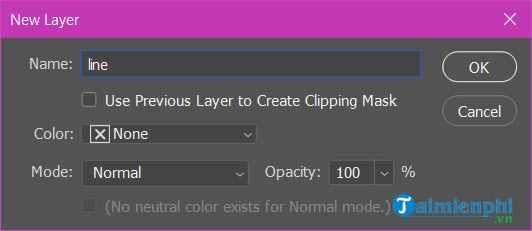
Step 20: Next we will use Rectangula Marquee Tool to create lines.
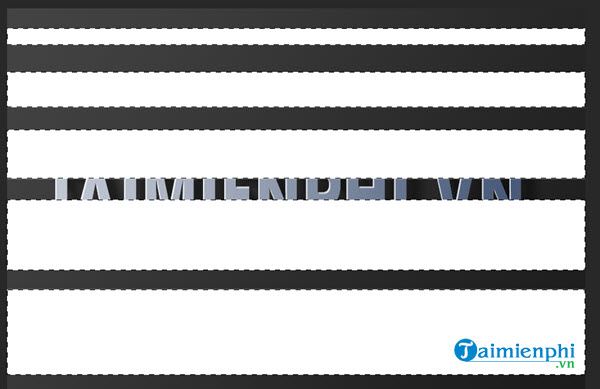
Step 21: Make the lines get bigger and bigger with this tool, remember Hold Shift if you want to draw a new line and after drawing, fill it with white.
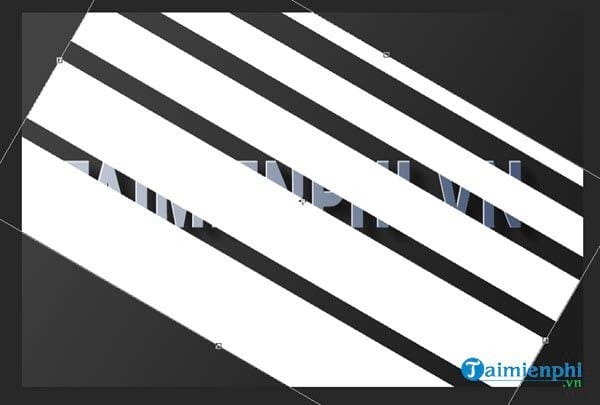
Step 22: Use Ctrl + key combination and rotate the angle 45 degrees as in the picture.
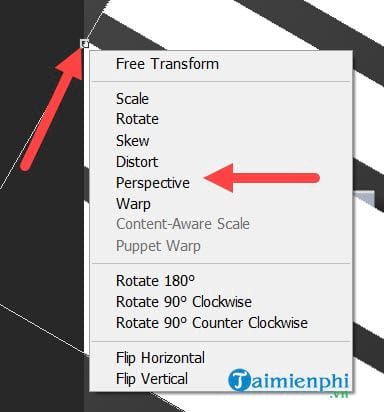
Step 23: Right click on the point between the select heads Perspective to be able to edit those ends separately.
Step 24: Drag for The top 2 are smaller and the bottom 2 are large like the image below or depending on your intentions, we use this layer line to create light, the light will bounce from the top.
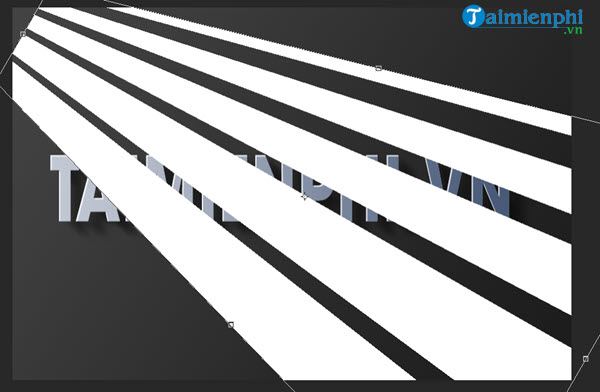
Step 25: Re-enter Filter > selection blur > and then select Gaussian Blur..
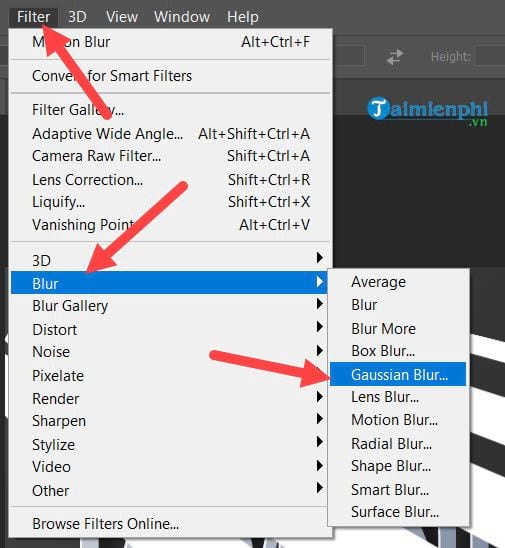
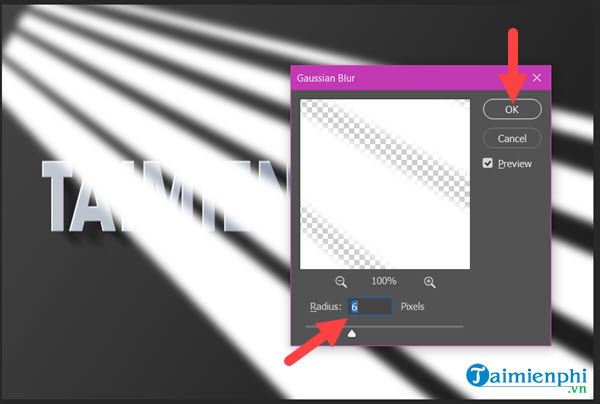
Here value Radius choice is 6.
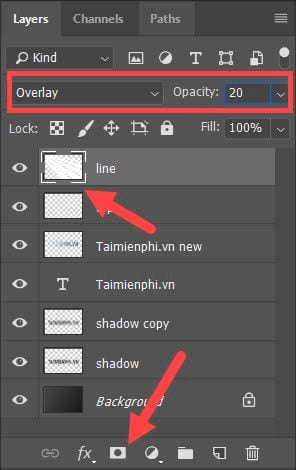
Step 26: Click on the icon of Line > selection Layer Mask below and then select Overlay with Opacity 20%.
Step 27: The result will be as follows, the ears light up but do not highlight certain letters.

Step 28: To make the light and shadow effect in Photoshop more realistic we need to add another layer and name it backgroundthis layer will stay at the bottom.
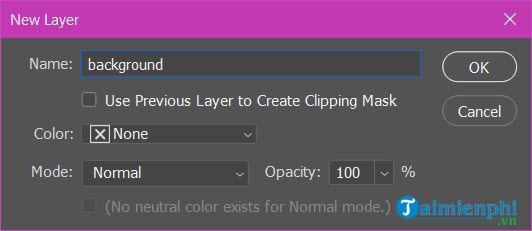
Step 29: This layer you will fill it with pink, namely color code #9D506C.

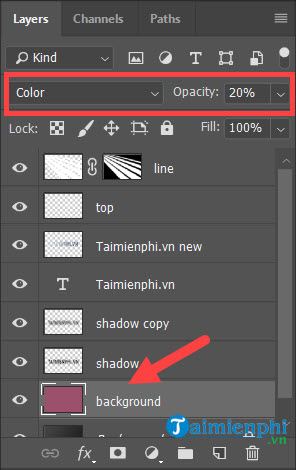
Step 30: Then convert this background layer to Color mode and Opacity is 20%.
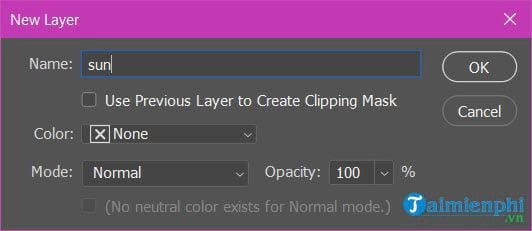
Step 31: Create another layer named sunthis layer will be above the previous background layer.
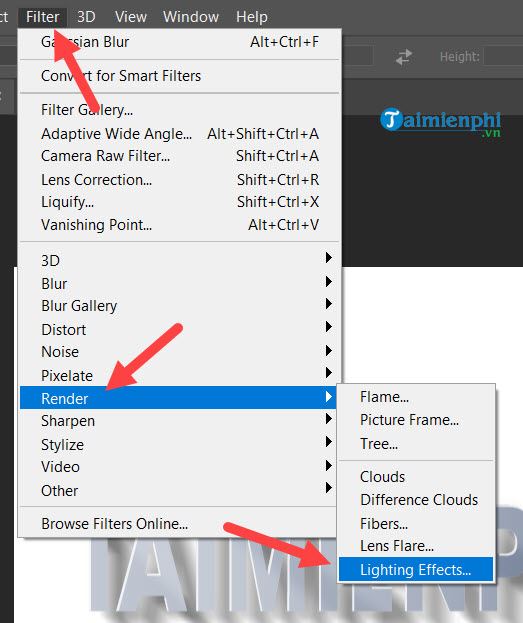
Step 32: Go to the filter again Filer > selection Render > choose next Lighting Effects.
Step 33: In Lighting Effects shadow selection as shown in the picture is 2 O’clock Spot…
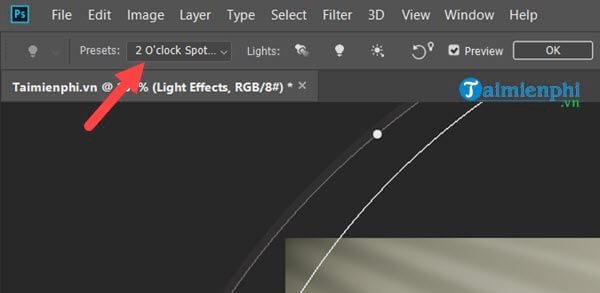
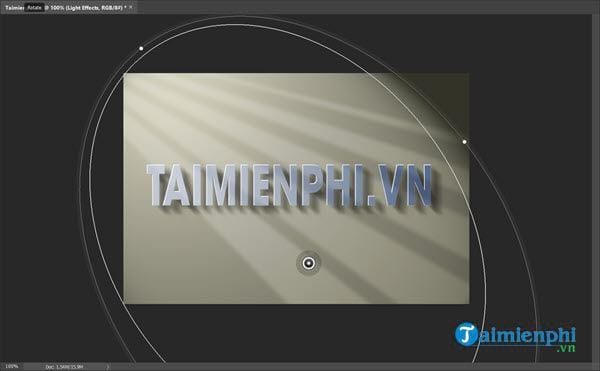
Step 34: Then you drag the circle for the light to bounce from left to right, top to bottom.
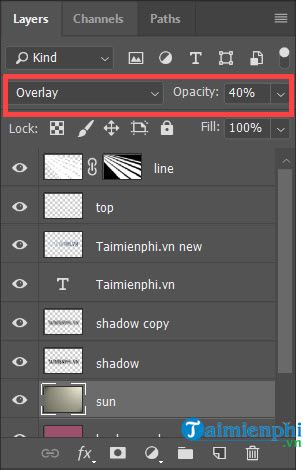
Step 35: Then adjust this sun layer to Overlay mode and to Opacity is 40%.
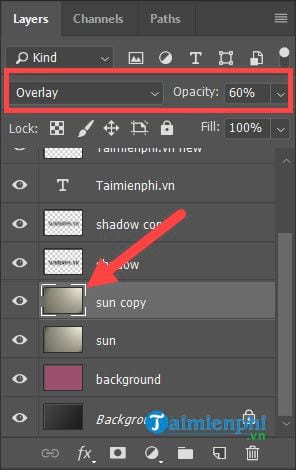
Step 36: Press Ctrl + J to duplicate this sun layer one more time, at layer copy edit Opacity to 60% is to be.
The result will be as below, so the trick to creating light and shadow effects in Photoshop is here.

Above is a guide on how to create light and shadow effects in Photoshop, through the above article we know more features and tools used and combined in the article. Although the content is a bit long, it is worth following along.
https://thuthuat.Emergenceingames.com/huong-dan-tao-hieu-ung-anh-sang-va-bong-do-trong-photoshop-34683n.aspx
Photoshop is software with which we can do a lot of things, a lot of different jobs besides creating light and shadow effects in Photoshop such as changing white skin to black. With instructions change white skin color to black in Photoshop will show you the magic of Photoshop.
Related keywords:
I understand you in Photoshop
I understand bong in Photoshop, I understand bong in Photoshop,
Source link: Tutorial Create light and shadow effects in Photoshop
– Emergenceingames.com


