Adobe Photoshop is the world’s most famous photo editing software and is chosen by many people. If in the previous article, Emergenceingames.com had introduced you to how to combine photos with Photoshop, in this article, we will introduce you to the technique of separating hair using the function. Channel available in this utility.

Separating hair from the background is one of the most basic photo editing and compositing techniques in Photoshop. However, if you do not know how to do it and only separate your hair when using the tool Lasso Tool it will not be able to separate the entire hair with small details attached.
Those of you who do not have Photoshop available can choose to download the version that suits you here: Download PhotoShop
Separate hair from background in Photoshop
Step 1: Open Adobe Photoshop software, select any photo to split.
Emergenceingames.com will guide you based on this photo

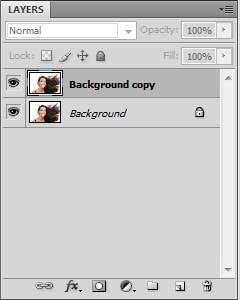
Step 2: After opening the photo, duplicate it by clicking Layers –> Duplicate
Switch to mode Channel
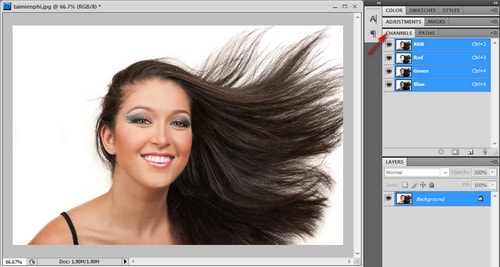
Step 3: Click on each Channel available, and choose Channel Which clearly shows the contrast between the character in the photo and the Background. In this picture, you can clearly see the mode Blue has the most pronounced contrast.
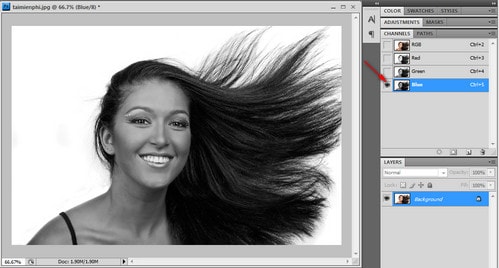
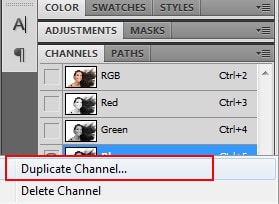
Step 4: Right click on mode Bluechoose Duplicate Channels to double Channels
Step 5: In the copied Channel, to make the contrast of the character and the Background clearer, use one of the following 2 methods to adjust the contrast:
– Levels ( Ctrl + L): Click Image -> Adjustments -> Levels
– Curves (Ctrl + M): Click Image -> Adjustments -> Curves
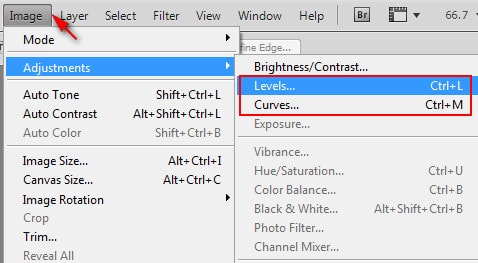
Here, Emergenceingames.com uses the mode Levels.
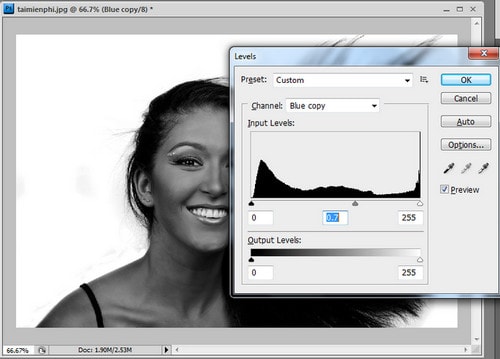
For a quick increase in contrast select White Point
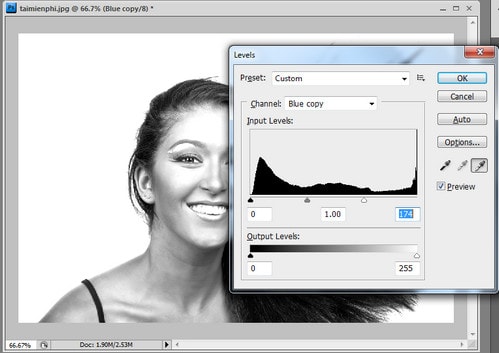
Color inversion Channel by pressing the key combination Ctrl + I
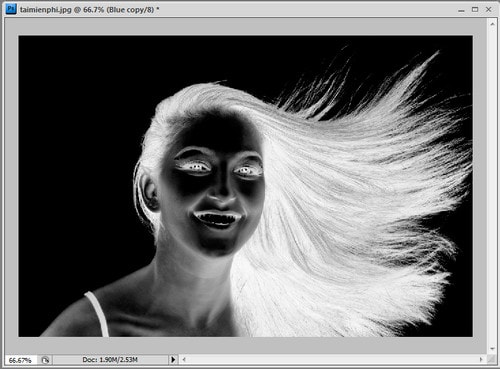
Step 6: Use tools Brush (shortcut B) and whiten the object
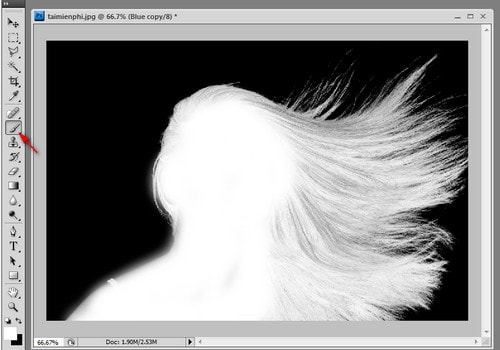
Keep key Ctrl on the keyboard –> click the picture Thumbnails of the Channel Blue copy
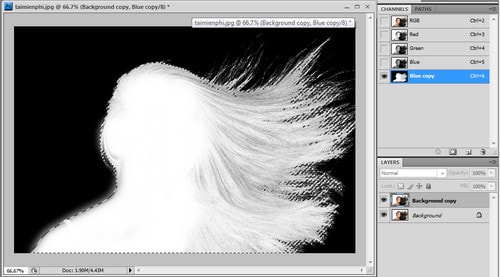
Step 7: Select mode again Channel RGB and Go through the layer area to duplicate the layer you just worked on
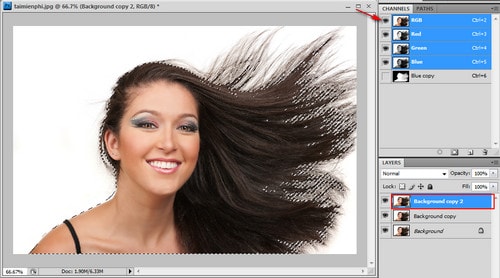
So we have successfully separated the image with the entire character’s hair, you just need to pair this character with another background image.
Here is the result

There are many ways to separate the hair from the available wallpaper and the above article is an example to help you do this trick in the simplest way. Use Adobe Photoshop to edit photos with many more functions.
Related keywords:
separate hair from background
separating hair from background, hair separation technique in Photoshop,
Source link: Photoshop – Hair separation technique with the Channel . function
– Emergenceingames.com


