Cartoon Maker not only helps you turn a small and pretty nose into a “terrorist” nose, a small eye into bulging or bigger eyes… The utility not only brings laughter to everyone but also has Very modest capacity to help you install and store easily on your computer.

What are the benefits of installing Cartoon Maker?
– Create surprisingly funny caricatures.
– Create your own pictures of yourself, of family, friends or famous people.
– Provide many sketch effects for the picture.
System Requirements
Install Cartoon Maker on computers using Windows operating system with all versions, including the oldest and newest versions.
Instructions for installing Cartoon Maker
Step 1: Open the folder containing the Cartoon Maker installer on your computer
Or if you don’t have it, you can download the latest version of the software to get the best features: Download Cartoon Maker
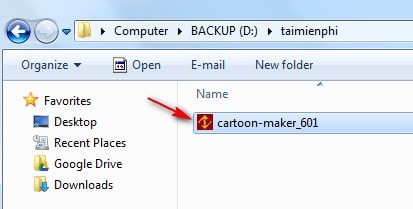
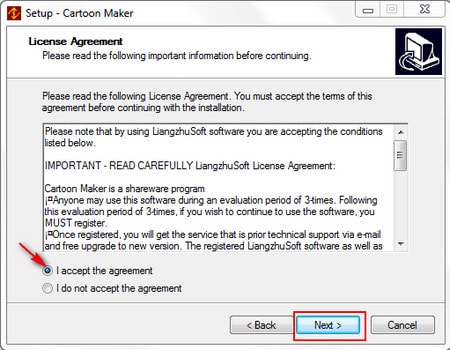
Step 2: Click nexta dialog box includes terms that the manufacturer requires you to agree to be able to install Cartoon Maker.
Bookmarked in I accept the agreement to agree –> click next
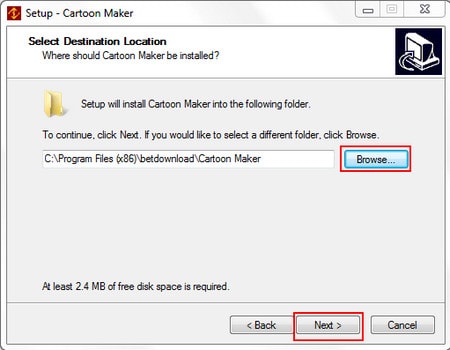
Step 3: Select the directory path containing the installation file after the installation is complete (the default path is C:)or you can change by clicking Browser.
Click next to continue
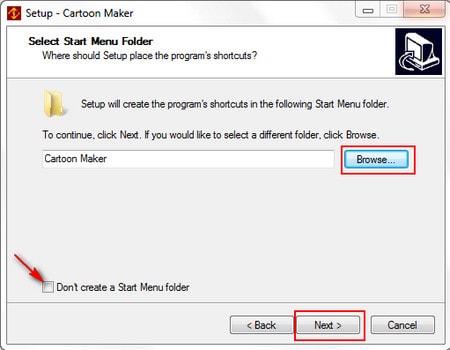
Step 4: Name the folder containing the Cartoon Maker shortcut in Start Menuor you want to put the widget’s shortcut in another folder choose Browser.
Checkmark Don’t create a Start Menu folder if you don’t want to create a folder for the widget in Start Menu.
Click next to continue
Step 5: The manufacturer allows you to choose one of two settings or choose not to or choose both settings if you want
– Create a desktop icon: Put Cartoon Maker icon on Desktop
– Create a Quick Launch icon: Create a quick launch icon on the Taskbar
Click next
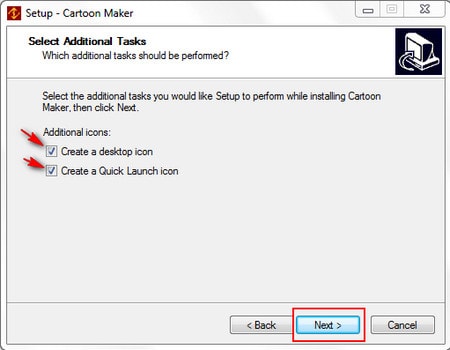
Step 6: Review the presets in this new dialog. Click Back to return to the previous steps to change if the setting is incorrect or click Install for the Cartoon Maker installation to begin.
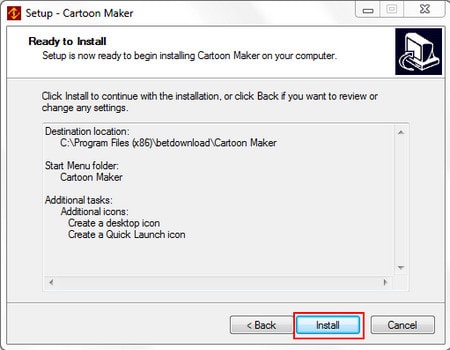
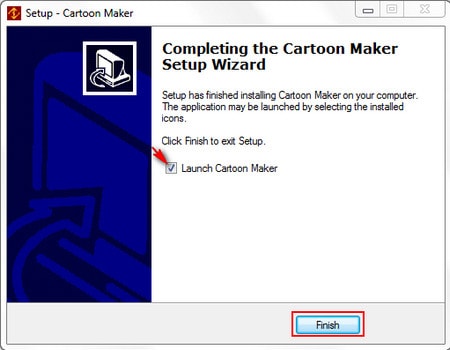
Step 7: Because the utility has a compact capacity, the installation time is also quite fast, tick Launch Cartoon Maker to start the program as soon as this window is closed.
Click finish to finish the installation
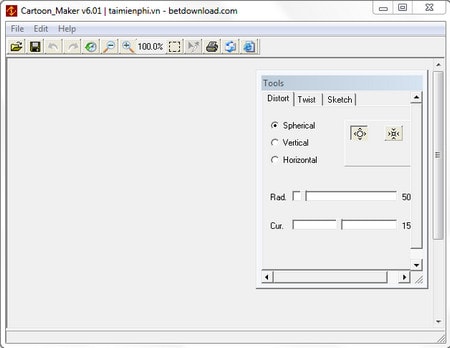
Cartoon Maker has an interface as shown below
Instructions for using Cartoon Maker to create cartoons
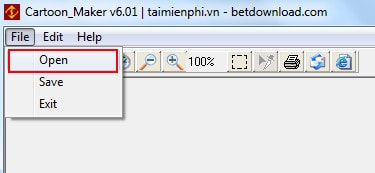
Step 1: On Cartoon Maker’s interface, open an image you want to edit stored on your computer, click File -> Open. Emergenceingames.com will guide you on the available image that Cartoon Maker has by default as an example.
Step 2: On the window Tools On the right side of the screen, there are available tools for you to choose from such as. During editing, to return to previous operations, you use 2 functions Undo and Redo available.

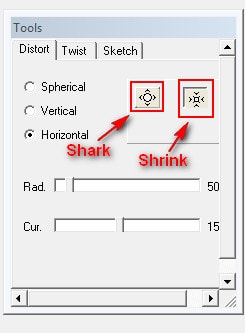
* In Tab Distort (distorting parts of the face or specific places on the photo)
– Spherical: Spherical deformation
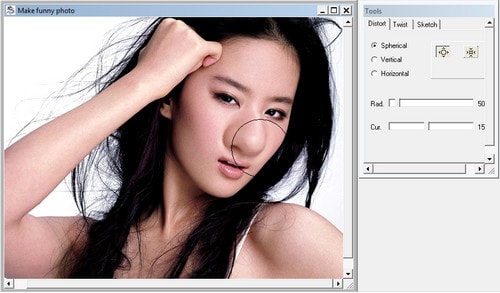
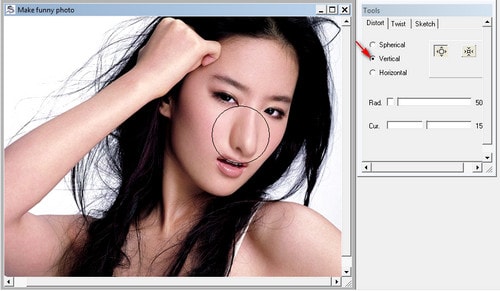
– Vertical: Vertical distortion of the image
– Horizontal: Distort image horizontally
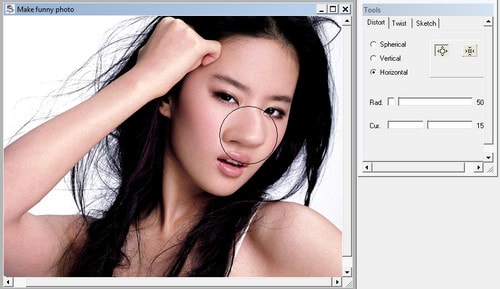
Also in Tab Distort This has 2 more functions:
– Shark: Deformation in the direction of enlargement.
– Shrink: Deformation in the narrowing direction.
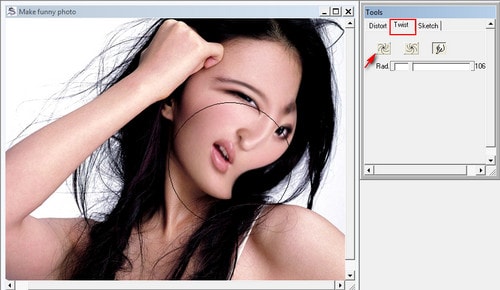
* In Tab Twist (change position by rotating), there are 3 tools available which are
– Dextrorotary: Rotate in the direction from right to left.
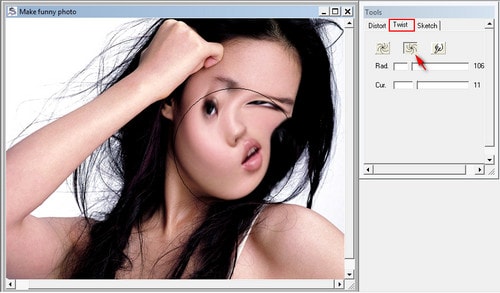
– Levorotatory: Rotate in the direction from left to right
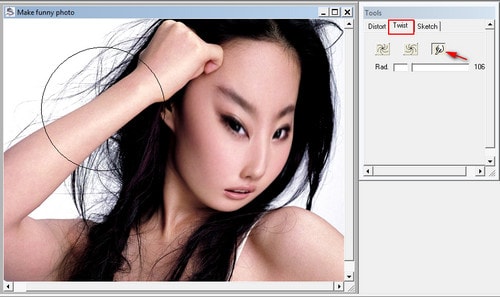
– Smear: Change according to the direction of mouse movement
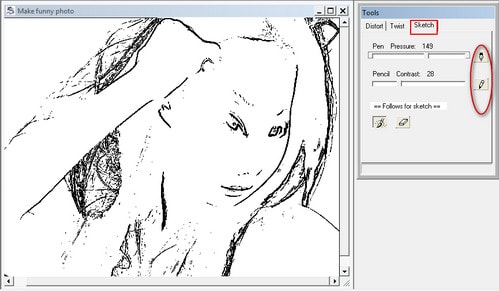
* In Tab Sketch (outline).
In this function, you can optionally change the color of the photo, create a pencil drawing or ink stroke if you want.
So with only 7 simple installation steps, you can use Cartoon Maker easily on your computer. After the installation is complete, the program will automatically display an available image for you to practice before or you can use it with the image on your computer.
In addition to Cartoon Maker, you can download other software to create other cartoons at Emergenceingames.com.
Related keywords:
install Cartoon Maker
install Cartoon Maker, how to install Cartoon Maker,
Source link: Install and use Cartoon Maker to create cartoons
– Emergenceingames.com
