Let’s say you are setting up a Hyper-V server on Windows Server Core 2016 to host test virtual machines that need to be detached from the main network. That’s why you need to enable Route and Remote Access service on Server Core to act as NAT to provide Internet access to all these virtual machines. Refer to how to install and configure Route, Remote Access Service on Server Core below.
Before reading the article below to know how to install and configure Route, Remote Access Service on Server Core, you can refer to the article. distinguish Router and Modem, Access Point, Modem Router to learn more about these devices.
Install Remote Access on Server Core
Step 1: On the Server Core console, type PowerShell go there to open.
Step 2: Install Remote Access using the command below:
Install-WindowsFeature RemoteAccess
Then enter Restart-Computer go there to restart your computer.
Step 3: After the computer has finished booting, the next step is to install the Remote Access PowerShell module with the command below:
Install-WindowsFeature RSAT-RemoteAccess-PowerShell
No need to restart your computer.
Step 4: Install Routing with the command:
Install-WindowsFeature Routing
Then enter Restart-Computer go there to restart your computer.
Configure and enable Routing
The steps to configure and enable Routing using Remote Access Management Console on Windows 10 are quite simple. Download and install Remote Server Administration Tools for Windows 10 such as Remote Access Manager as part of that toolkit.
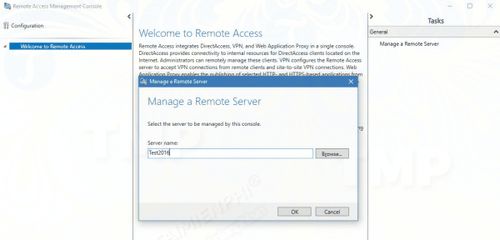
Launch Remote Access Management Console, then click Manage a Remote Server in the list Task in the right frame.

After successful connection, click DirectAccess and VPN in the left pane and Open RRAS Management located in the VPN section in the right pane.

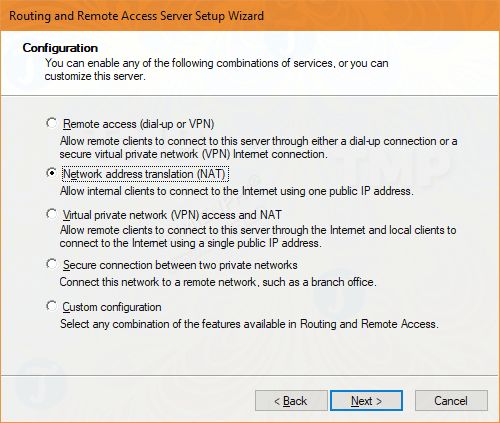
On the Route and Remote Access window, click Action then choose Configure and Enable Routing and Remote Access to open the configuration window.

Select Network address translation (NAT) in the left pane and then click Next.

Select the NIC with Internet access to provide Internet and the Virtual Switch for the VM as Internal Network.

If everything is perfect, you should be up and running Routing in seconds.
https://thuthuat.Emergenceingames.com/cai-dat-va-cau-hinh-route-remote-access-service-tren-server-core-31318n.aspx
Above is how to install and configure Route, Remote Access Service on Server Core. Hope the above article will provide you with useful information. Remember to share the article with your friends and family.
Related keywords:
Install and configure Route on Server Core
install and configure Remote Access Service on Server Core, install Route and Remote Access Service on Server Core,
Source link: Install and configure Route, Remote Access Service on Server Core
– Emergenceingames.com


