In the process of creating photo slides, Photo Story 3 also allows you to put music on the slide or narrate each image yourself through a computer microphone or headphones. Photo Story 3 for Windows supports most of today’s most popular image formats such as jpg, pdg, eps, … or audio formats such as wma, mp3, wav,…. Photo’s publishing file Story 3 has the default format of WMV, this format can be easily shared with friends as well as uploaded to Youtube right away without changing the format. Please follow the article How to use Photo Story 3 for Windows down here.

How to use Photo Story 3 for Windows
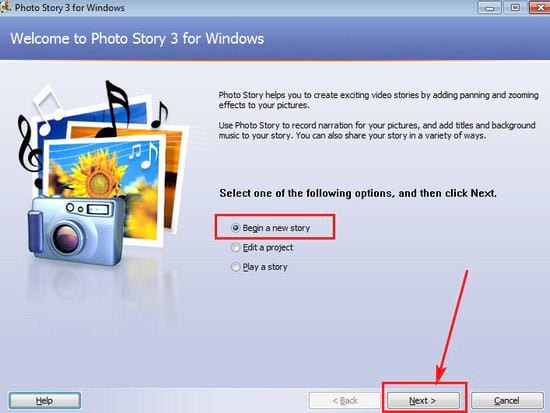
Step 1: After having install Photo Story 3 for Windows success, you start the software. To set the default as Begin a new story and choose next
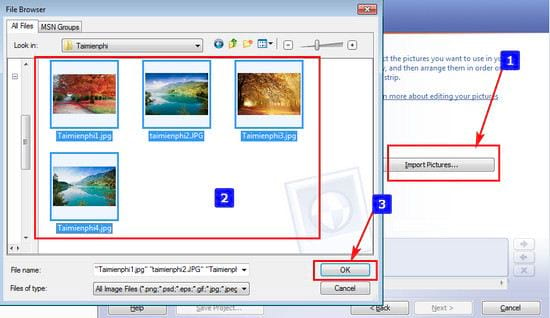
Step 2: You click on Inport Pictures… and browse to the photo container, select all the photos you want to add and click Open to add the image you want to create a slide into the software
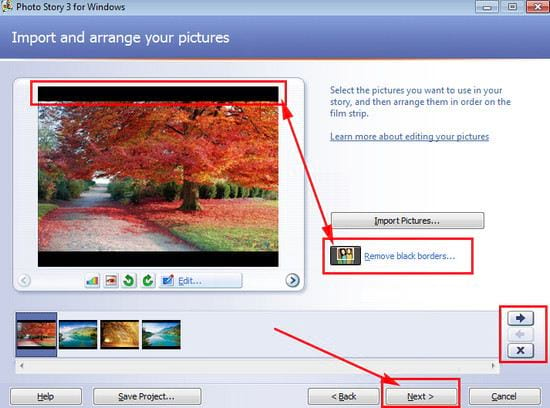
Step 3: You will see 4 photos have been added, you can change the order of photos by holding and dragging the photos left or right. You can also use arrow button to change this order. Knot X used to delete added images. Also, if you want to remove the black border on the slide, click Remove black border… Finally click next to continue.
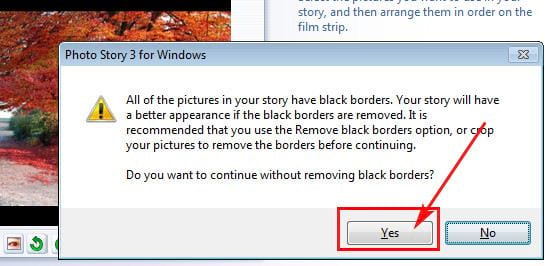
Step 4: The system will ask if you want to continue without removing the black border, in this example Emergenceingames.com will leave the black border and choose. Yes to continue.
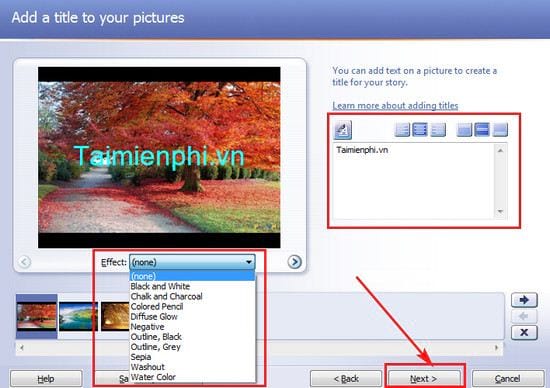
Step 5: Here you can optionally add text to each image.
– You select the AA icon to adjust the font size, font, font color, … the buttons next to it to adjust the position of the text appearance.
– You can also change photo effects like Black and White (black and white), Colored Pencil (Crayons), ….
Finally click next to continue
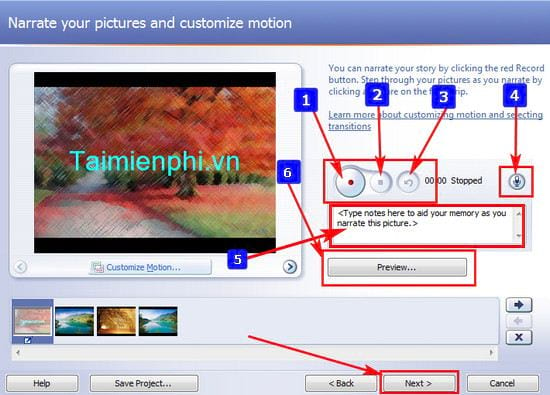
Step 6: This step will help you record your voiceover for each photo.
– 1 – Record Narration: Start recording
– 2 – Stop Recording : Stop recording
– 3 – Delete Narration: Delete the newly created recording
– 4 – Configure Microphone: Set mic, volume for recordings
– 5 – Notes: Add notes to the newly created recording
– 6 – Preview: Preview the recording
Click next to continue
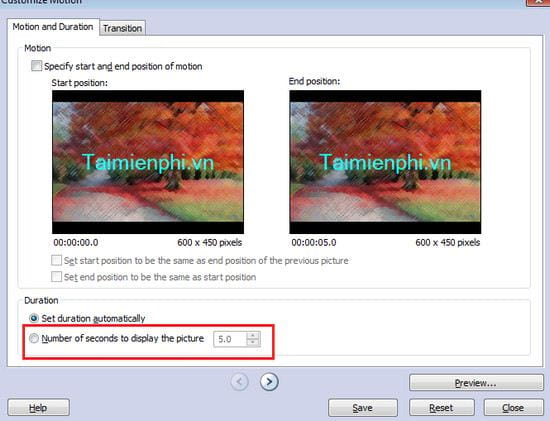
Step 7: Also in the step above you can also click on Customize Motion… continue with other settings. You will see there are 2 entries Motion and Duration and Transition
– Motion and Duration: Set the image appearance time. The default mode will be 5 seconds, you can change this time by ticking Number of seconds to display the picture and enter the time (in seconds).
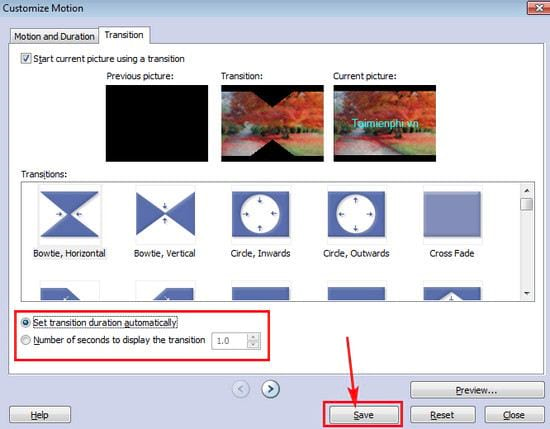
– Transiston : Set the appearance of the image. You will have a library of many ways to appear for your images. You can leave the default time to start all images or customize the time by clicking Number of seconds to display the transition and select the time (in seconds).
Finally click Save to save the settings just finished.
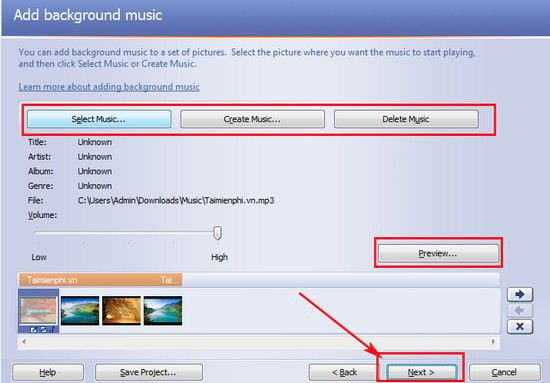
Step 8: Here you can add music to this Photo Slide. You can choose from available music by clicking Select Music or make your own music by clicking Create Music.
Click Preview if you want to check it out. Click next to move on to the next step
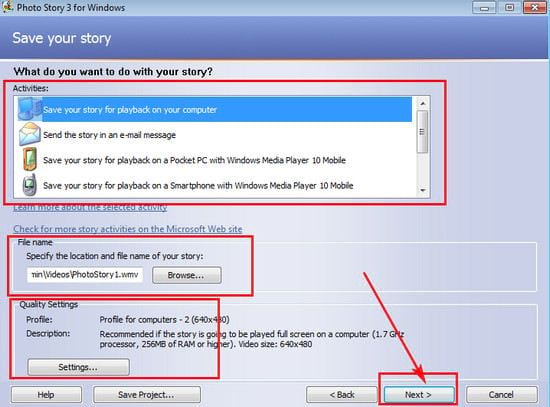
Step 9: Last step, Save the work done.
– Activities : Choose the action you want to perform such as saving the video slide file on your computer (Save your story for playback on your computer) or sending it to a friend via email (send the story in an email message),…
– FileName: Name and choose a save location for your photo slide
– Quality Settings: Customize quality for video slide photo
Click next to start saving
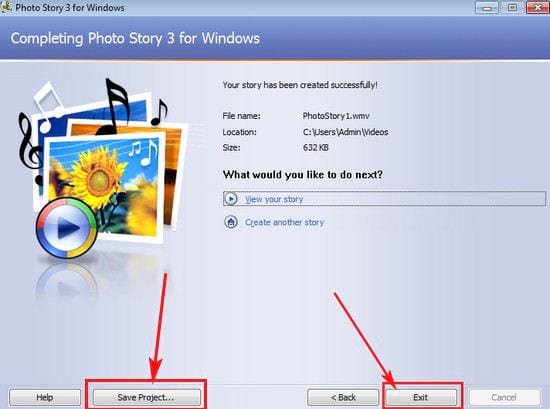
Step 10: The photo slide video saving is completed. Here before clicking Exit To finish, you should save the whole process of making this slide by clicking on Save Project… for later editing.
https://thuthuat.Emergenceingames.com/cach-su-dung-photo-story-3-for-windows-29762n.aspx
Above is the entire process of using Photo Story 3 for Windows to create photo slide videos. Good luck.
Author: Nguyen Thuy Thanh
3.9– 16 evaluate)
Related keywords:
How to use Photo Story 3 for Windows
how to use Photo Story 3 for Windows, use Photo Story 3 for Windows on your computer,
Source link: How to use Photo Story 3 for Windows
– Emergenceingames.com


