Tips Remove acne in photos with Photoshop is one of the features that a lot of Photoshop users want to learn first. Beautifying yourself is always a top priority and if you want to use Photoshop for your work, then the trick to remove acne in photos is what you need.
Erase text on photos with Photoshop
Instructions to delete text on photos with Photoshop
– To be able to remove acne in photos with Photoshop, we first need to have this software in the computer. Click here to proceed with the download Photoshop for computer.
>> See how install Photoshop here if you have never installed this software.
Step 1: Assuming we have a case like below, now let’s remove the acne in the image using Photoshop with this case.
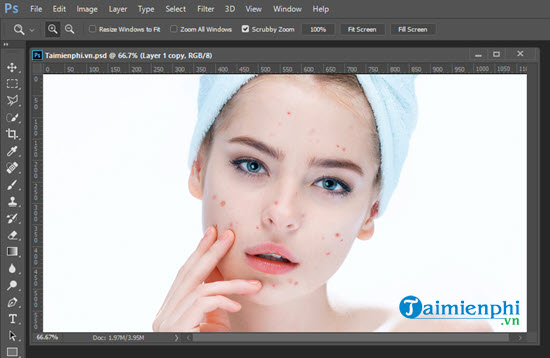
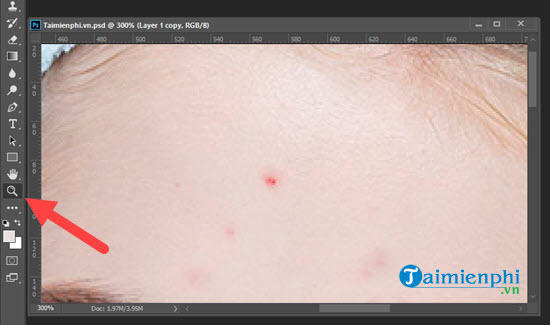
Step 2: We first use zoom tool To enlarge the image, the larger the image, the easier it will be to manipulate.
Step 3: Then use the tool Elliptical Marquee Tool to proceed to localize the acne spots and delete.
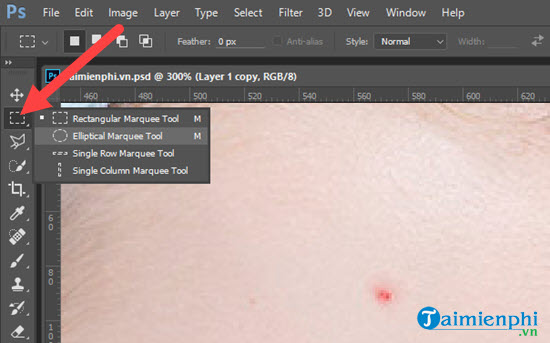
Here you only need to localize the acne, this zoning will help the other areas not be affected.
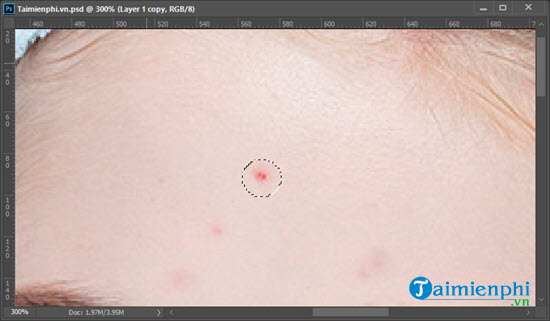
Step 4: Next, use the Spot Healing Brush Tool to proceed with the synchronization of your skin with the corresponding color.
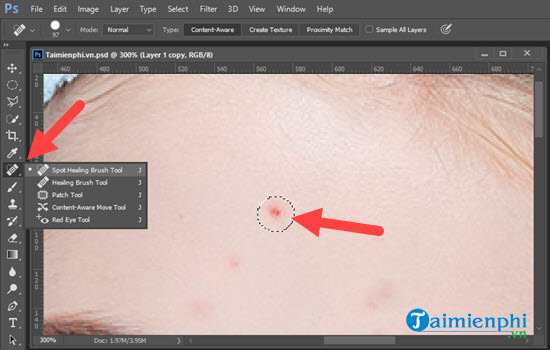
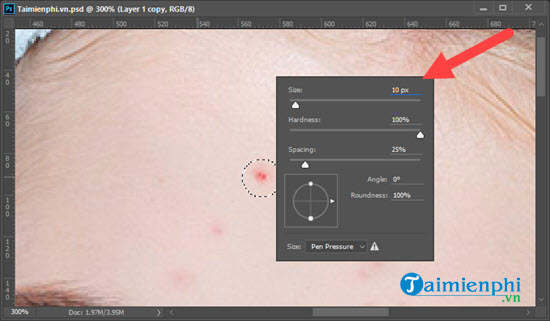
Before that, please adjust reduced pixels to fit the area of your image for easier color synchronization.
Step 5: Then click on it and you will see that the acne-prone skin has disappeared and replaced with your new skin.
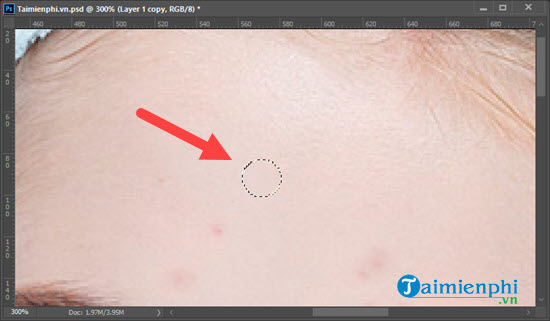
The results apply to the rest with the above method, you will get the results after applying acne removal in the image with Photoshop.
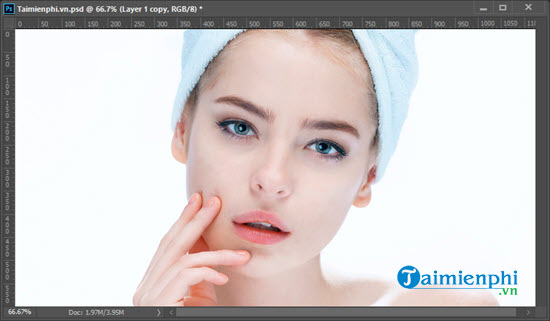
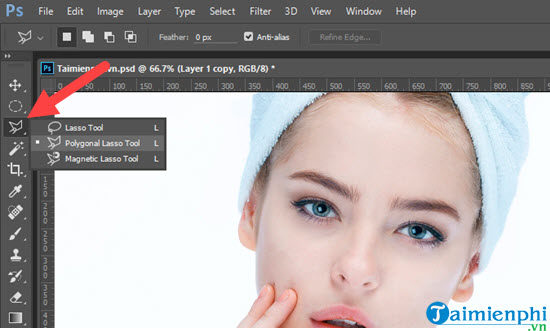
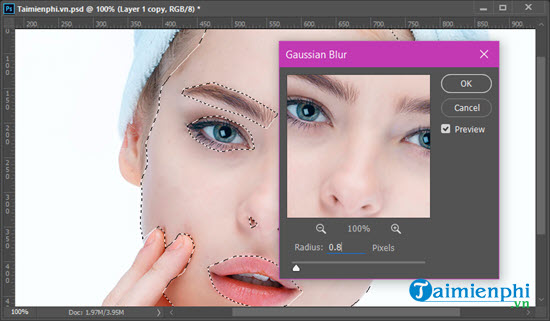
Step 6: To make the photo more perfect and beautiful we can use the tool Polygonal Lasso Tool to delineate facial skin.
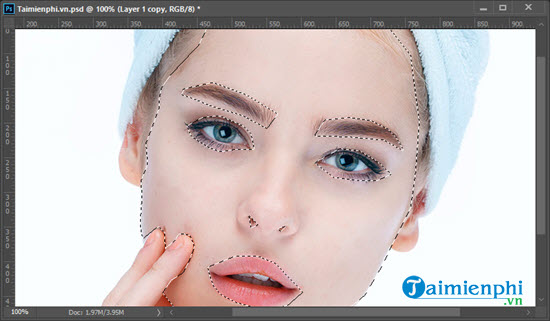
Specifically, you will exclude the eyebrows, eyes and lips as well as the nostrils. We only deal with leather here.
Step 7: Next we look up on the selection menu bar Filter > choose next Blur > and select Gaussian Blur…
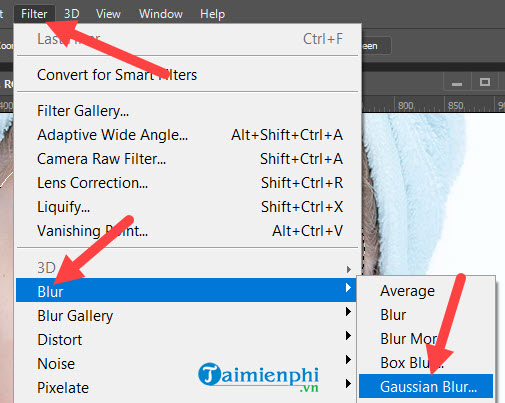
Step 8: Here you customize the degree Gaussian Blur at your own discretion to make the skin beautiful without looking too virtual, like the example in the article we show the background 0.5 – 1 . adjustment never mind.
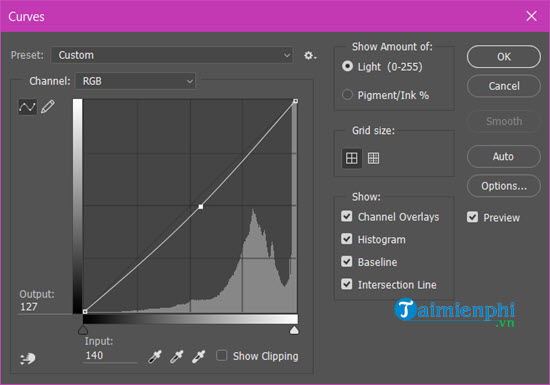
Step 9: Finally use Curves by key combination Ctrl + CODE and pull the color a bit to harmonize and show the beauty of the skin.
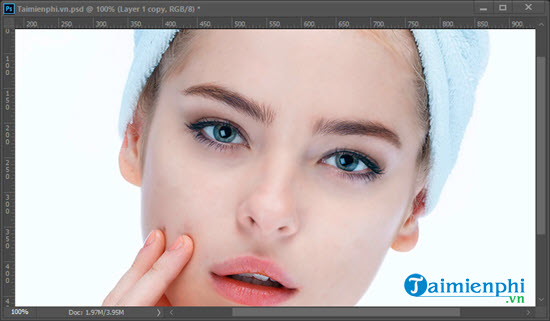
The final result after a series of post-editing we will get as shown below.
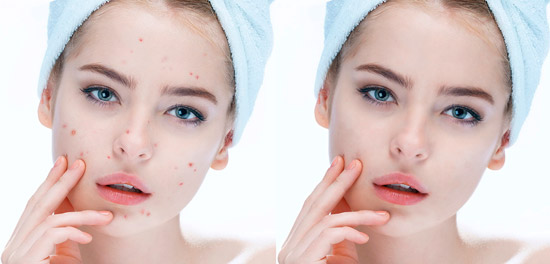
And when you compare it with the original photo, you can see how effective it is to remove acne in photos with Photoshop.
There are many tricks in Photoshop that are very rich, learners can apply it to similar products and remember that each tool used in your lesson can be applied to many different situations. many different purposes. This is also a way to help you approach Photoshop CS6 or other versions easily.
In addition, in any trick, we also need a lot of Photoshop keyboard shortcuts to work faster. If you want to become a Photoshop master, knowing and getting acquainted with the Photoshop keyboard shortcuts is the right thing to do.
https://thuthuat.Emergenceingames.com/cach-xoa-mun-trong-anh-bang-photoshop-53963n.aspx
Photoshop is a tool that brings together all the features for designers, there are many basic features in Photoshop that users can easily get used to. Therefore, regularly monitoring the Photoshop column of Emergenceingames.com is the way for you to know and get acquainted with the Basic features in Photoshop that before accessing more advanced features.
Related keywords:
ebony in english bang Photoshop
make min skin in Photoshop, use Photoshop to rub ebony,
Source link: How to remove acne in photos with Photoshop
– Emergenceingames.com
