Suppose for some reason you need to create a virtual gmail, such as to use an online service. So what are the steps?

How to create virtual Gmail?
- See also: Create group in gmail, create email group in gmail
How to create a simple virtual gmail
Method 1: Use the Gmail customization trick
To create a virtual Gmail account, we will use a trick to customize our account.
Step 1: Suppose if your email address is “[email protected]“. When asked to enter an email address on a service or website that you do not want to use the main address, in this case we just need to add a specific tag to our email address, such as “[email protected]“, good “+unwantedemail.gmail.com” as the screenshot below.

Messages and emails sent to the new address will show up in your inbox.
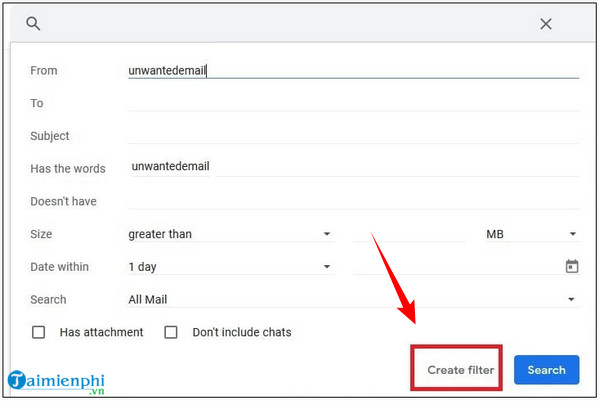
Step 2: The next step to create Gmail is to set up a Gmail filter that automatically deletes emails and messages sent from the created virtual email address. To do this, enter a specific tag in the Search box at the top corner of the inbox window, then click the arrow icon on the right side. Add tags From . section (from) on the filter window, then click Create filter (create filter).

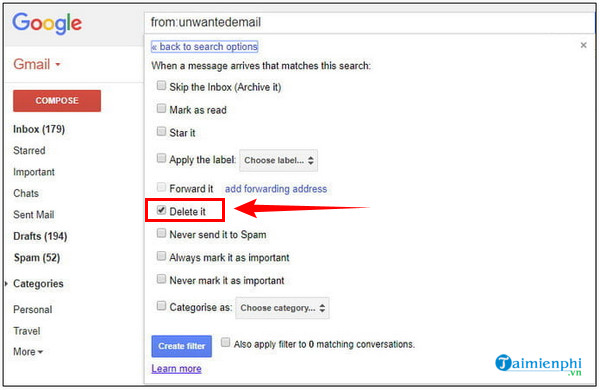
Step 3: On the next window, check the box next to the item Delete it (delete), then click Create filter (create filter). From now on, messages sent to the virtual gmail address you created will no longer show up in the inbox.

Method 2: Use Burner Mail to create virtual gmail
Another way to create a virtual gmail account is to use the Burner Mail extension. Follow the steps below:
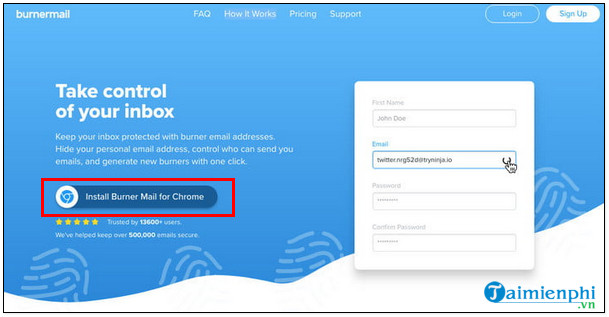
Step 1: Go to the Burner Mail page and select Install Burner Mail for Chrome. You will now be redirected to the Chrome Web Store window, here click Add to Chrome to add extensions to the browser.

Download Burner Mail to your computer and install it here.
=> Link to download Burner Emails for Chrome![]()
Note: You will need to sign in with your Google account during the process.
Step 2: When you visit a website that requires email login, just hover your mouse over the frame and on the screen you will see a Burner Mail icon, which is a small flame icon, and an automatically generated virtual email address. Select this email and the newly created address is automatically added to the frame.
All messages and emails sent to the newly created virtual address will show up in your inbox.
Step 3: If you don’t want to receive messages, emails sent from the new address, all you need to do is select the Burn Mail icon and see all the created addresses. Hover over option Block sender and on the screen an optional toggle bar will be displayed.
Just turn off, disable the email address to block messages and emails sent to that address.
In addition to Burner Mail, you can use other services like Mailinator or 10 Minute Mail to create virtual gmail addresses. In which Mailinator allows creating virtual email addresses and setting up automatic deletion of addresses after a few hours. If you create a virtual email address on 10 Minute Mail, by default the email will be deleted after 10 minutes.
- See also: How to sign up for Gmail on your phone
https://thuthuat.taimienphi.vn/cach-tao-gmail-ao-don-gian-60152n.aspx
The above article Taimienphi.vn has just shown you some ways to create virtual gmail. In addition, readers can refer to some existing articles on Taimienphi.vn to learn more about how to recover messages on Gmail.
Related keywords:
How do I use gmail?
Instructions for setting up a virtual gmail account, Create the simplest virtual Gmail,
Source link: How to create a simple virtual gmail
– Emergenceingames.com
