Photoshop is a popularly used professional photo editing software with a lot of useful features to help us edit photos. You can also change photo background with Photoshop turn desert wallpaper into beach, turn unsatisfactory wallpaper into beautiful wallpaper.

INSTRUCTIONS TO REPLACE THE PHOTOSHOP BACKGROUND
The simplest way to change the background of an image in Photoshop is to separate the object to be kept and the background. Photoshop has a lot of different tools that allow us to do that, but in this article Emergenceingames.com will use the tool. Quick Selection in Photoshop CC 2017.
Step 1: Select the object to keep
You choose the tool Quick Selection Tool on your left hand toolbar, or you can use the keyboard shortcut W. You click and drag to select the area you want to keep, Photoshop will automatically predict the areas you want to keep based on the contrast level of the image. In this example we will keep the girl in the image.

Before proceeding, you can resize the image in Photoshop to better fit the background of the image you intend to combine later, the trick to resize the image in Photoshop is quite simple, you can refer here Resize images in Photoshop
You can also select the background to delete instead of selecting the object to keep because for some photos it is easier to select the background than to select the object to keep. You use keyboard shortcuts Shift + Ctrl + I on Windows or Shift + Cmd + I on Mac to invert the full area.
You will eventually see the selection, but there may be areas of detail that you don’t want to select but are still selected. This is very normal because Photoshop can only predict, we will edit these details in the 2nd step.
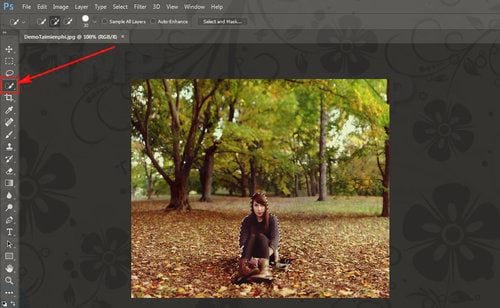
Step 2: Detail adjustment of the retained selection
To adjust the details of the selection to keep that you have selected, you can enlarge the image and choose the size of the brush to reduce the size to suit editing the details by entering the selection in the upper toolbar.
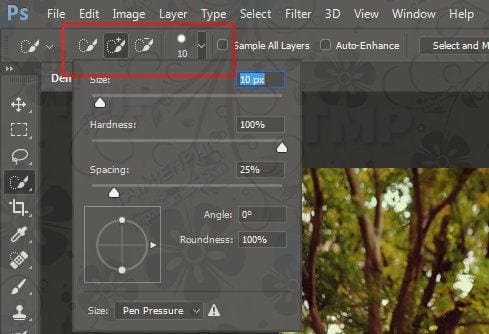
You can now select and adjust the selected area in more detail… or choose to remove unwanted selections by holding down the key. ALT and click.
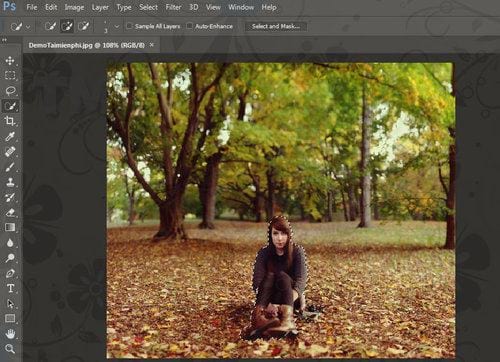
Step 3: Masking an image with the Select and Mask tool
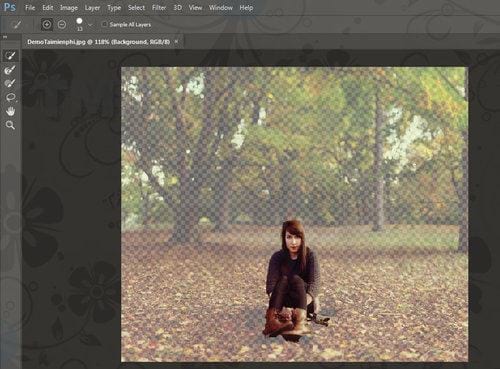
Purpose of using the tool Select and Mask is to help clearly show the area you have selected, from which you can refine the selection in the most accurate way. You will find the Select and Mask tool right at the top of the screen.
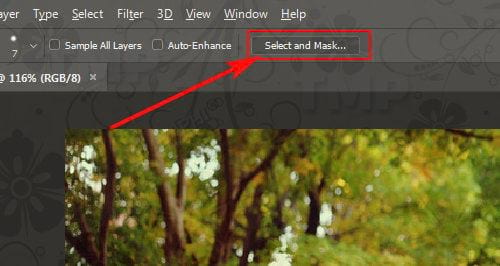
The result is that the image shows only the selected part, the unselected part will be converted into a “mask” with a completely different color and contrast to the selected part.
The left side is the dialog box Propertiespart View mods will allow you to select the mask style. Which side do you choose so that you can see it most easily. With me, In White maybe the ideal choice for you, you can press the . button F to transform different mask styles during fine-tuning.
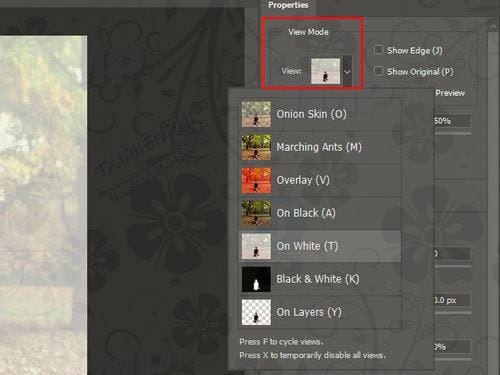
Step 4: Fine-tune selected area
Now you continue to refine and select other details like hair or other soft edges. You can choose different tools on the left toolbar such as:
– Quick Selection Tool: Tool like we used in step 1, this tool can help you to quickly adjust to add or remove selection on your image
– Refine Edge Brush Tools: This tool will be used to refine areas such as hairs or other soft edges
– Brush Tool: Used to adjust the hard edges on the image
– Laso/ Polygonal Lasso Tool: This tool will help you draw the area manually to add or remove parts in the selection.
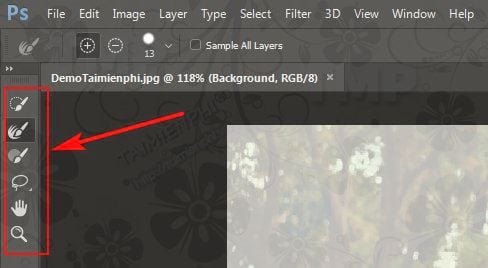
Now you can zoom in on your photo by holding down the . key Alt and roll the mouse up. You will also see the selection is not very accurate, missing or redundant. Use the tools above to fine-tune and complete your retention selection.
Step 5: Adjust settings
In tools Select and Mask Another item that can be used to adjust the selection is Global Refinements. Some of the main features of this item are
– Smooth: Smooth the edge of the selection, remove the zigzag lines. Apply well to selections with clean borders.
– Feather: Soften the edge of the selection.
– Contrast: Increase the contrast of the selection, highly effective only when combined with the Feather bar.
– Shift Edge: Expand or narrow the selection. When you drag the bar to the left, the selection is narrowed, and when you drag it to the right, the selection is expanded.
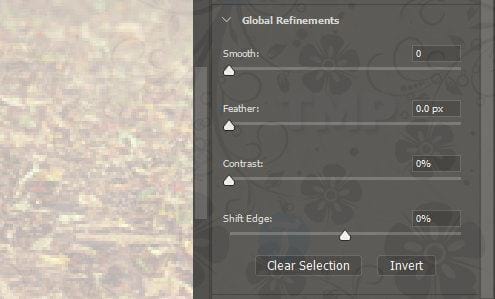
Step 6: Remove background
After you have finished refining the selection to keep, choose to check Decotaminate Colors in section Output Settings. Item Output to normally will automatically select as New Layer with Layer Maskif not automatically selected, please choose.
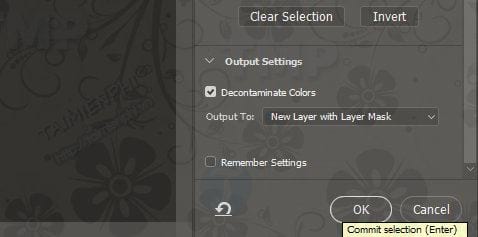
Finally you just need to click Ok it’s done
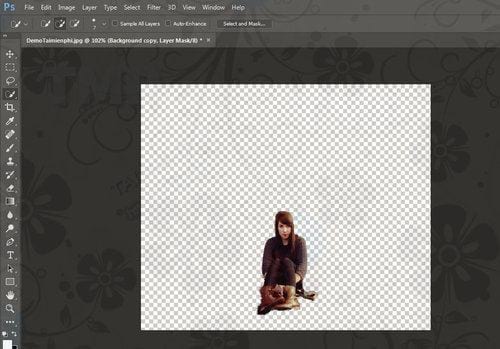
Step 7: New wallpaper stickers for photos
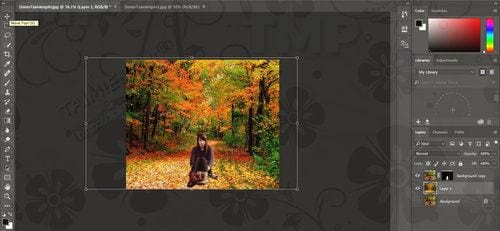
Next, you paste a new background for the photo. Place it below the photo containing the object that we’re working on above
You can use the tool Move Tool (keyboard shortcuts V) to move the new background image or retain object so that it fits together. You can also use the tool Free Transform (shortcut Ctrl + T or Cmd + T), hold Shift to keep the scale even.
Step 8: Correct color correction
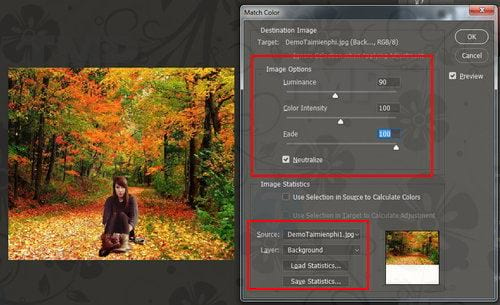
The final step is to edit the color of the object and the background blood to match each other. Select the layer containing the object, then select it on the menu item Image => Adjustments => Match Color
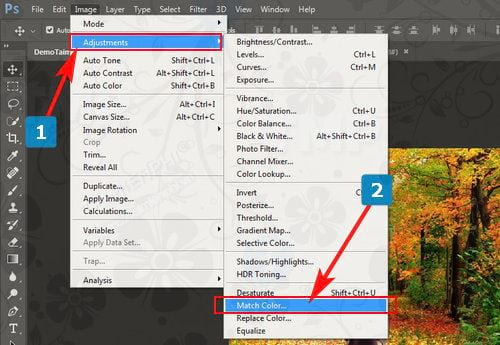
In the dialog box Match Coloryou find Source and choose the photo contains a new background. You have selected Neutralize to remove all the color casts from the selected layer and adjust the 2 bars Luminace and Color Intensity so that the object and background image have the same color. You can reduce the color effect by using Fade necessary. Finally click Ok to complete.
After replacing the image background with Photoshop, you can sharpen your image, the steps to sharpen the image in Photoshop have been carefully shared by Taimienphi.
https://thuthuat.Emergenceingames.com/huong-dan-thay-nen-anh-bang-photoshop-29444n.aspx
Above is a guide to change the image background in Photoshop. You save the image after you are satisfied, you should save it as a PSD so that you can keep the entire editing process in case you want to change another background image. Hopefully, through this article, you can understand the steps to change the background of an image based on Photoshop. Good luck
Related keywords:
change photo background with Photoshop
change the background image in photoshop, change the background in photoshop,
Source link: How to change photo background with Photoshop
– Emergenceingames.com


