The majority of people who have Edit photos with PhotoScape All have the same opinion about this software that is versatile and interesting. Among the many photo editing features are the photo collage feature in PhotoSpace, the photo collage feature that allows merging multiple photos into one very easily that users can apply to create unique composite photos, matchless. And how to use photo collage in PhotoSpace, you read the details of the article below.

Instructions for merging and nesting multiple photos into one in PhotoScape
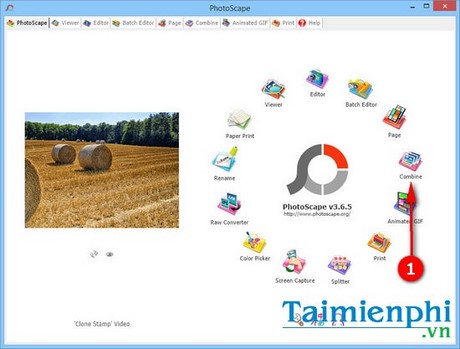
Step 1: Go to PhotoScape. In the main interface, you select the item Combine to open collage mode in PhotoScape.
Step 2: In the interface Combineyou press Add >Add a photo or press the Insert button on the keyboard. If the Insert button is built into other buttons such as PgDn On a laptop, you just need to press the key combination Fn + PgDn (contains Insert).
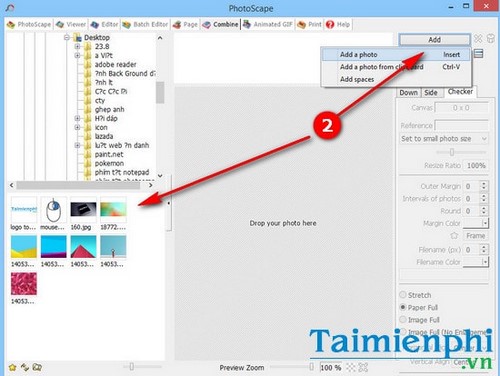
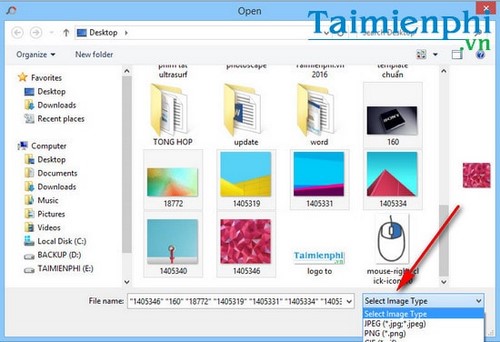
Step 3: Select the photos you want to combine photos in PhotoSpace into a common image. Click Open to open in PhotoScape. Or you can also choose the images available in the Desktop folder off the screen.
Note, you can filter the image format to include in PhotoScape by clicking the Select Image Type option right below the command box.
Step 4: Users can customize the collage frame in the form of a list (down), a horizontal (side) or a grid (checker).
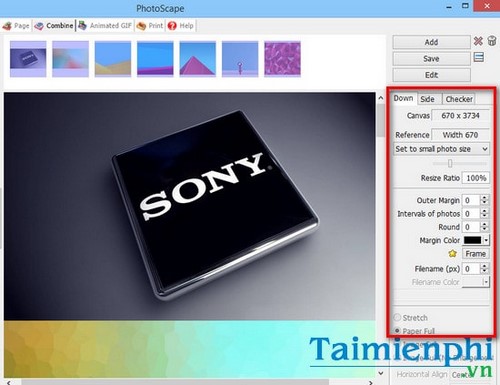
– You can easily resize the collage in PhotoSpace by selecting the item Set the reference size. In addition, there are some other options such as: Maintain the internal size (keep the original size), Set to first photo size (set size for first photo), Set to big photo size (set size for largest image), Set to small photo size (set size for smallest photo)
Other parameters include:
Outer Margin (outer border), Interval of Photos (inner border), Round (create circular image), Margin Color (choose color for border), Frame (art frame for image), Filename (image file name).
Only applicable for Checker format: Stretch, Paper (full frame), Image Full (full frame), Image Full No Enlargement (paper frame not enlarged). Horizontal Align (horizontal alignment), Vertical Align (vertical alignment), column (number of columns).
Step 5: To delete each photo in a series of photos, select the photo you want to delete and then press the “X” icon on the upper toolbar.
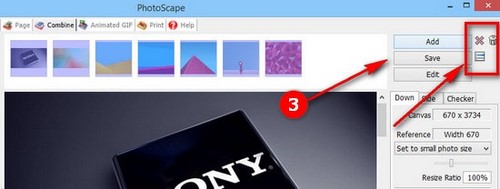
To delete all photos, select the trash can icon.
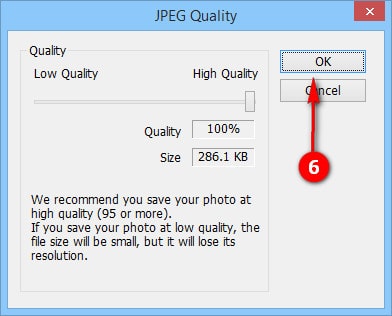
Step 6: Press Save to save. You can choose the image quality by dragging and dropping to Quality. .
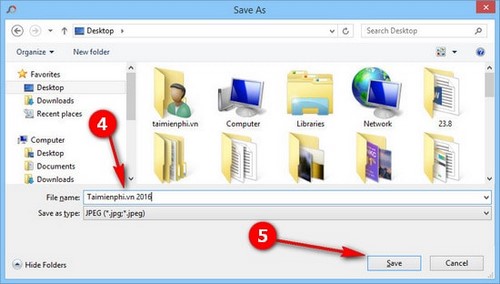
Press OK to confirm saving the image to the computer.
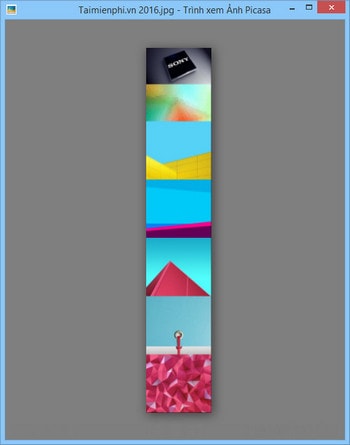
Results after merging photos in PhotoSpace.
Collage in PhotoScape is not a difficult trick to do for many people. However, to create collages with this software is really not that simple.
Contrary to the photo merge feature in PhotoSpace into one, the software can also split an image into many different images equally interesting. So you can both split and merge directly on PhotoScape easily without the need for other supporting software.
Also owning the feature of nesting, collage of photos and many other professional photo editing features, Adobe Photoshop or Fotor are such software. If users can edit photos more intensively on Photoshop, when using Fotor, users have more access to beautiful filters, professional art framing features no less than PhotoScape. Indeed, these are all the best photo editing software available today that every user needs.
https://thuthuat.Emergenceingames.com/cach-ghep-long-nhieu-anh-thanh-mot-trong-photoscape-7867n.aspx
Hopefully the trick of combining photos, nesting multiple photos into one in PhotoScape will help readers.
Related keywords:
many brothers in photoshop
how to edit photos in photoscape, how to edit photos in photoscape,
Source link: How to combine and nest multiple photos into one in PhotoScape
– Emergenceingames.com
